Showing posts with label POR15. Show all posts

Monday, October 17, 2011

Lathe

Things have been going very slowly around here for the last few months! Work, other projects and a back injury followed by a foot injury have conspired against me!

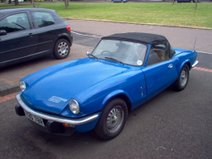
Despite being busy, I have managed to do a small amount of work on the Spitfire. The windscreen is now out and didn't reveal too many horrors - just a little rust in the rain channels! The bonnet is now stripped down completely apart from the rear bonnet cone panels. I want to keep these on for as long as possible to get the right shape but I really need to sort out the bit where they meet the bonnet wing flange. There are three panels spot welded together here and rot has, rather unsurprisingly, taken hold. I think the easiest solution is going to be to chop it out and let some new metal into the flange before tackling the cone panel and then the wing.


Once I have repaired all the panels, I need to start getting them cleaned up and I've made a bit of an investment in a 3hp compressor from Jawel Paints so that I can get some grit blasting done. Grit blasting has a bit of a bad reputation with classic car restorers and a quick read of the Internet might have you believe you were practically guaranteed rippled panels. The reality of it is, though, that damage to panels like that can only be caused by industrial equipment and is not something that can easily be achieved at home!

To complete the kit, I bought a cheap sandblasting gun from Machine Mart which may or may not be any good (I haven't tried it yet!) and some J-Blast Supafine grit which came highly recommended on the MIG welding forum.

One of the other projects I have just finished is this mini lathe. I bought it off eBay as a complete wreck. It's an Emco Unimat design made by Elliott Machine in the UK. There is a huge following for these little lathes and parts crop up fairly regularly on eBay. According to http://www.lathes.co.uk/unimat/ my lathe is a Mk4 Unimat and probably originated from around 1959 - 1960.


I started the restoration off by stripping the paint. I couldn't decide if this was original or not but I guessed not because it looked like green Hammerite and it was literally slapped all over everything (including the plastic motor brush caps) but I have since seen a few finished like this! Either way, it got a few coats of the same grey POR15 I used to repaint my gearbox.


The rusty metalwork got a thorough dunking in derusting solution, whilst the seized chuck got a thorough soaking in penetrating oil followed by a bashing against the soft wood of my workbench!


The trickiest bit by far was the motor. Unimats are powered by a U-90 motor made in Holland by Motoren Eindhoven. Its a nicely made motor and has big 'Oilite' bearings but suffers from a low duty cycle. For every 8 minutes it's in use you have to let it rest for 2! It did work when I got it, but I took it apart anyway to repaint and instantly realised that all was not well with it. For a start, there was some very dodgy soldered connections inside that had been left bare and, secondly, there was supposed to be a suppressor inside. The only trace it had ever been there was a couple of soldered tags!

This was a bit of a problem. The motor would run without the suppressor but the brushes would wear rapidly. Unfortunately, the original type of suppressor hasn't been available for years and the only one available is too large to go inside the motor. I decided that the only real option was to use a suppressor from Maplins and mount it outside the motor.

Fitting the suppressor and putting on a new flex involved a lot of fiddly soldering in a very dingy, confined space but I eventually got it done! I find a soldering gun rather than a soldering iron makes these unpleasant jobs much more straightforward, not least because mine has a light on the front that comes on when the trigger is pulled!


The last job was to fit a new switch and plug. The originals were Bakelite and had seen much better days!

That's it! After a few false starts (due to a brush not making contact) the motor ran up nicely and sounded much healthier than it did before. All that's left to do on it is to heatshrink the suppressor to the cable to tidy it up and think of some things to make on it. My drill press has some nasty plastic bits on the feed handle that could be replaced by something nicer so I think that might be my first project.

Friday, March 26, 2010

Gearbox out!

This week has been a busy one! I started the week by fitting one of those 'Stant' lever radiator caps. This is straightforward enough but, if you're thinking of fitting one, you need to get a few things right. Firstly, the pressure rating has to be right (13lbs) and, secondly, it has to fit under the bonnet! I checked this very carefully before dropping the bonnet down for the first time!

The next job was a big one! The gearbox needed to come out so I could replace the engine's rear oil seal. I won't bore you to death with the details of how I got the gearbox out but it did involve a hell of a lot of brute force, wood and jacks. Believe it or not, I did it all on my own too!

The oil leak had made one hell of a mess. The inside of the bellhousing, bottom of the gearbox and the underside of the car were absolutely caked in oil and dirt!

The standard cast iron bellhousing weighs nearly as much as a chest freezer! I bought an alloy replacement from Moss last year and started preparing it to fit. It's not the best casting I've ever seen but I think it'll do. I've painted it inside and out and I've gone for grey POR15 this time to show up any oil leaks! It's a very similar colour to my workshop floor!

The seats are looking good. I've bought another seat foam set from Owen at Park Lane Classics. I haven't had time to do any more work on them though. I'm waiting till the gearbox is out of the way and my workshop is less dirty before I start work on them again!

Tuesday, February 09, 2010

Fun with POR15!

POR15 is a really tough finish paint that is a great way to finish off loads of underbonnet parts. It leaves a very glossy and durable finish but requires a bit of care to apply. This is my quick guide to using POR15 and getting the best results!

Firstly, if you're painting something really smooth (like these aluminium radiator valances), you're going to have to rough the surface up a bit. I used a fairly fine sanding block which just took the shine off the metal without leaving any deep scratches. Once that's done you need to degrease using POR15's own degreaser. This is called 'Marine Clean' and is a vaguely greenish liquid that you dilute with water and coat the part with. This normally comes in a screw top bottle but I have prediluted mine and decanted it into an old spray bottle. After leaving to soak for a while, wash off the part with plain water.


The next stage of the process requires the use of 'Metal Ready'. This is another POR15 product and is basically a blue liquid that seems to etch the metal slightly. I guess that this contains phosphoric acid but I don't know for sure! You need to keep the surface of the part wet for a minimum of 15 minutes. Again, I have decanted mine into a spray bottle to make this easier. After 15 minutes or so you need to wash the piece again to clean off any residue.


The etched surface is slightly grey and sometimes a bit 'powdery'. This is OK! You are now ready to move on to the next stage...


You now need to be quite organised to avoid making a mess. I'd advise you to use plenty of newspaper over your workbench as it's going to be near impossible to clean up if it all goes wrong when you're pouring it! Get your brushes ready and also have some cling film and a jam jar ready. It's also wise to wear gloves because this stuff is pretty difficult to get off!

So, what you need to do is to open the tin of POR15 very carefully and either pour it or use a coffee scoop to transfer it into the jam jar. It is VERY important that you cover the tin with the cling film before you put the lid back on. If you don't you'll have to use water pump pliers to rip the lid off - trust me on this! Now you're ready to paint.

I strongly recommend using a foam brush. The POR15 starter kit comes with one or you can buy a pack of 20 for £5 off eBay. This will help minimise brushstrokes and will look neater. It goes on pretty easily. Don't stress too much if it looks a bit 'brushstrokey' as it seems to level really nicely after about 15-20 minutes. If you have paint left over in the jam jar you can seal it with cling film and use it later. Stored like this it seems be usable for a few days before it drys out.

And there we go! It should be touch dry in around an hour. Unfortunately one of the disadvantages of POR15 is that it's not UV resistant. Apparently it discolours and turns brown with prolonged exposure to sunlight but won't actually fail. In order to prevent discolouration you can use another POR15 product which is resistant to UV, such as 'Blackcote', which is what I have used here.

And that's it! You're done! One of the common misconceptions about POR15 is that you can't get it off anything. They actually do sell a thinner that you can use to clean brushes etc but it's quite pricey at around £20. That seems pretty expensive when you consider that the starter packs cost around £15 and contain 'Marine Clean'. 'Metal Ready', paint and two brushes! When I get it on my hands I find it comes off easily enough if I wash them straight away. If it dries then it takes a few days to wear off!

Wednesday, February 03, 2010

Going back together...

I'm slowly getting the engine back together! Just before christmas I recieved an alloy water pump housing from Canley Classics. I was a little bit suprised to see it as I ordered it ages ago and it had been on back order for about a year! Initially I was annoyed that Canleys had just sent it (and billed me) without asking me if I still wanted it, but when I checked my email I found they'd emailed me about a week before and I'd totally missed it so I can't really complain!

As luck would have it I was just about to repaint the waterpump, housing, engine front plate and pulley with POR15. I was tempted to leave the new housing in bare alloy but in the end I thought it'd look better painted. Two coats of POR15 with a top coat of Blackcote and it looks the business! It gives a really deep gloss black. Just compare it to the 'normal' engine enamel on the black in the pics! I'm going to be using a lot more of this stuff in the future! The only thing that is annoying is that it sometimes leaves annoying brushstrokes so you're better off using foam brushes. Look on eBay if you need some - they're £5 for 20!

I had a great idea with the timing cover bolts and screws - I numbered them. This will come in handy the next time I need to take them off!

This is my 'refinished' thermostat cover. Normally there is a number cast into the top. I thought this spoilt the smooth lines so I sanded it off and polished it up. Looks much better!

Sunday, November 22, 2009

Are You Sitting Comfortably?

That's the question I was asking myself. The answer was a resounding 'no'! One of the things I learnt from the Historic Counties Run was that the passenger seat is infinitely more comfortable than the drivers seat! Hardly surprising really - Collapsed foam and ripped vinyl crudely 'retrimmed' in gaffer tape are not the last word in comfort!


I have entered the Club Triumph Round Britain Reliability Run next year and I really wanted to get the seats sorted before then so I got started! My initial thought was to get another set of seats in better condition and swap the drivers side seat base with my knackered one. Taking a closer look at my seats quickly changed my mind. Even the passenger side was completely knackered. Just moving them produced copious amounts of foam breadcrumbs! Even the metal parts of the base were thin and seriously rusted.

I decided the best thing to do would be to get some more seats from eBay and use their guts! Fortunately eBay came up trumps with a set of seats (already partly dismantled!) in Derby. I set off after work on Thursday to pick them up. They guy selling them was building a Rover V8 powered Spitfire which looked like quite a piece of engineering. I had a look at the seats in it too. They were leather and very nice. I had a look at the seats he was selling and, whilst they weren't as nice as the ones he wasn't selling, they were much better condition than mine!


So now I had something to work with I set about stripping down the drivers side seat. The backrest had already been stripped down so all I had to do was strip down the seat base. I found it quite interesting how the seat is constructed. Basically there is a very basic steel seat frame. On top of this goes a steel 'basket' which is constructed in a similar way to a shopping trolley. At the bottom of the basket is a piece of 'millboard' to stop the foam sticking through the bottom of the basket. Attached to the millboard is the sensor for the seat belt warning light. This is then covered with two big lumps of foam. The vinyl then goes over the whole lot and attaches using 'hog rings' to the wire basket. To the uninitiated ' hog rings' are basically a C shaped bit of metal that pierces the vinyl and is then closed with a pair of pliers.

I stripped the seats down and started cleaning up the metal parts. I've recently invested in a new Black and Decker angle grinder (to replace my ancient Clarke model) so I set about the frame and 'basket' with the knotted wire cup brush. Once I'd cleaned them up I set about painting them with POR15. Before painting you need to go over all the parts with 'Marine Clean' to degrease them. I did this in the garden to save getting the workshop too wet! The metal then needs to be coated in 'Metal Ready'. This seems to etch the metal and leaves it covered in zinc and makes it ready for paint. I then painted it with the POR15. This is nasty stuff and I always use gloves and very cheap B&Q brushes because you can't clean this stuff off!


The seat frame just needs another painting session and it's good to go. Unfortunately the 'basket' from the donor seat has come unwelded at one of the joins so this needs to be corrected before I can paint it. My plans for the future involve new straps, new foam and LEATHER! Watch this space!

Sunday, March 15, 2009

Stoneleigh etc!

I had a busy weekend last week! I still managed to fit in the spares day at Stoneleigh though. It was literally a drive there, quick look around, go home event for me this year. My grandma was taken into hospital on the Friday so I had to be back to visit her along with various other things. It was still quite a successful trip though. I picked up a new set of carburettors from Andrew Turner and bought various nuts and bolts. The carbs are awesome and a huge improvement over my last set - Andy had a look at those and pronounced them knackered! The new ones are not only better (fitted with seals around the throttle spindles) but shinier too! I'll post some pics of them at a later date.

I also got on with the heater box this week. Painting it was my first experience with POR15 and I've got to say I'm pretty impressed. It's not the easiest to use because you have to clean the part in various solutions first and then you've got to transfer some of the paint to another container and seal the can with cling film. You also need to wear gloves or everyone at work will be asking you why your hands are black! The results were pretty variable. The first parts I painted ended up covered in brushstrokes whilst some of the later parts look similar to powdercoat. It's certainly interesting stuff!


I also got around to sorting out the hose that runs from the inlet manifold to the heater valve. This is usually a shaped piece of rubber hose but I wanted to replace it with silicone to match my other hoses. Having a custom hose made would've cost a fortune so I decided to use two 90 degree bends and a piece of alloy tube that I bent to shape. This looks good and gets the job done on time and under budget!


I'm sure there are people reading this that are going to be thinking that I should have used a flexible hose because of the movement of the engine. I have checked this out and it all seems fine. My engine is fitted with new mounts and doesn't vibrate around all over the place! There is also a load of flexibility in the silicone parts so I don't think it's going to be a problem!

Sunday, March 01, 2009

Heater Box Issues

A while back I mentioned that I was looking for a heater box to replace the rusty one with a broken linkage that came off my car. I did eventually manage to track one down on Ebay nut when it arrived I realised it wasn't going to be as simple as just chucking it in the car!

It was advertised as a 'Mk4 and 1500' heater box so, naturally, I thought it'd be the same as the one I had. It was, however, slightly different internally, with a different resistor and motor wiring! After carefully studying the two designs I decided the best course of action would be to drill out the rivets holding the internals in the original box and remount them in the new one. In order to do this I had to cut out the different brackets in the Ebay box. This then left a couple of small holes close to each other.
Obviously it's not great having holes in a heater box, so I decided the best thing to do would be to drill them out into one big hole and fit a grommet. This seems to be working out okay so far and I'm just waiting for some POR15 to arrive so I can paint it.
I've finally got around to cutting out the passenger side engine valance. These are coming on slowly and just need a bit more fettling to fit. Then I can make some brackets for them and maybe finally get them powdercoated!


I really want some parts to arrive this week. The HCR is getting nearer and I'm still waiting on a list of parts as long as my arm. Moss said my alloy bellhousing would take two weeks and that was just over two weeks ago so hopefully that'll be arriving soon. I'm also still waiting on my alloy water pump housing. I was told at the end of Jan that it'd take a week and it's still not here!