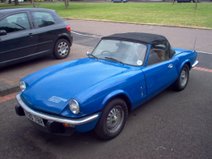
I have entered the Club Triumph Round Britain Reliability Run next year and I really wanted to get the seats sorted before then so I got started! My initial thought was to get another set of seats in better condition and swap the drivers side seat base with my knackered one. Taking a closer look at my seats quickly changed my mind. Even the passenger side was completely knackered. Just moving them produced copious amounts of foam breadcrumbs! Even the metal parts of the base were thin and seriously rusted.
I decided the best thing to do would be to get some more seats from eBay and use their guts! Fortunately eBay came up trumps with a set of seats (already partly dismantled!) in Derby. I set off after work on Thursday to pick them up. They guy selling them was building a Rover V8 powered Spitfire which looked like quite a piece of engineering. I had a look at the seats in it too. They were leather and very nice. I had a look at the seats he was selling and, whilst they weren't as nice as the ones he wasn't selling, they were much better condition than mine!


So now I had something to work with I set about stripping down the drivers side seat. The backrest had already been stripped down so all I had to do was strip down the seat base. I found it quite interesting how the seat is constructed. Basically there is a very basic steel seat frame. On top of this goes a steel 'basket' which is constructed in a similar way to a shopping trolley. At the bottom of the basket is a piece of 'millboard' to stop the foam sticking through the bottom of the basket. Attached to the millboard is the sensor for the seat belt warning light. This is then covered with two big lumps of foam. The vinyl then goes over the whole lot and attaches using 'hog rings' to the wire basket. To the uninitiated ' hog rings' are basically a C shaped bit of metal that pierces the vinyl and is then closed with a pair of pliers.
I stripped the seats down and started cleaning up the metal parts. I've recently invested in a new Black and Decker angle grinder (to replace my ancient Clarke model) so I set about the frame and 'basket' with the knotted wire cup brush. Once I'd cleaned them up I set about painting them with POR15. Before painting you need to go over all the parts with 'Marine Clean' to degrease them. I did this in the garden to save getting the workshop too wet! The metal then needs to be coated in 'Metal Ready'. This seems to etch the metal and leaves it covered in zinc and makes it ready for paint. I then painted it with the POR15. This is nasty stuff and I always use gloves and very cheap B&Q brushes because you can't clean this stuff off!


The seat frame just needs another painting session and it's good to go. Unfortunately the 'basket' from the donor seat has come unwelded at one of the joins so this needs to be corrected before I can paint it. My plans for the future involve new straps, new foam and LEATHER! Watch this space!


No comments:
Post a Comment