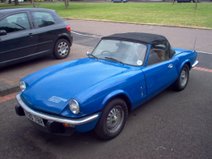
I've been working far too hard at work this year! I can't carry more that 5 days over to the next financial year so I've
had to take four days off this week! It's been nice spending some time on the car and I've got a good number of the little jobs done.
On Saturday I had 'fun' with the water pump. I fitted this last week but I thought I'd better tighten up the nuts properly. You can't get a socket on these because of the pulley so I used one of my ratchet spanners. This was going well right up until I did up the last nut. I felt the nut tighten and then suddenly slip. I was gutted! My first thought was that I'd stripped the thread in the alloy water pump housing. Fortunately, I was lucky and it was just the stud! I couldn't get the stud off in situ so I had to remove the water pump.
I got a new stud in and made myself a new gasket. If you've never made a gasket you should try it! It's really easy and it saves loads of time. You can use card from a cornflake packet if you're desperate but the pukka stuff, which I use, is 'Flexoid' paper. It's really cheap on eBay and it can really get you out of a jam! All you need to do is trace around an existing gasket or place the paper over the flange and rub it over with a dirty finger to highlight the edges and then cut it out. You can make the holes by hammering a bolt into the paper. Easy!

Anyway, once I'd smeared a bit of Loctite 5926 gasket sealant on the faces I started bolting the water pump back in. This was all going well right up to the point where something threaded again! I couldn't believe it! This time it was the nut! I got a replacement and gave that a go. This time the stud threaded!
Something was definitely going on here! Once I looked into it, it was obvious what the problem was - the studs were too short! There weren't enough threads of the stud in the nut to take the torque of tightening. Once I'd realised that (and made another new gasket and found some longer studs) I was back in business. Sorted!
On Sunday I went to Stoneleigh. It was a brief visit again for me this year but I saw a few familiar faces and met a few new ones. There was loads of stuff for sale and I saw quite a few bargains. I really, really, wanted the mint bonnet that was for sale at £180 but I just couldn't have got it home in the back of my Golf! Instead I settled for picking up a few useful nuts and bolts!
On Monday I got my Nippon Denso alternator fitted. I'm still figuring out how the hell I'm going to wire this up but at least it's physically fitted in the car. I used a Canleys fitting kit. It was good but I'm going to replace the adjusting plate with a couple of rod ends in the near future.

On Tuesday I spent the day fixing the brakes on my Golf. The pads had seriously worn down with all the miles I'd been doing for work. In one case the friction material was down to 1.38mm! I decided to replace both the discs and pads as the discs had a massive groove around the edge because they seemed to be slightly oversize. I ordered replacement parts from Euro Car Parts and set about doing the job. It was all going swimmingly until I realised that the drivers side caliper wasn't sliding properly. Unfortunately the metal sleeve that the caliper slides on was seized solid on the caliper bolt and I had to destroy it to separate the two. Amazingly, my local VW dealers had the part in stock and I managed to get it back together on Wednesday morning!


On Wednesday afternoon I decided to finish off my anti roll bar links. I made my own out of rod ends from McGills Motorsport. There was a bit of work needed to get them fitted. I needed to drill out a sleeve to make a spacer and source some longer bolts for the wishbone end. Drilling out the sleeves was easy thanks to an 11mm cobalt drill bit from Namrick! Sourcing the longer bolts was tricky though. I couldn't find any online and eventually I had to get out the Yellow Pages. This worked out nicely and I turned some up at Nutters Fastenings in Nechells, Birmingham, which is just a few miles from where I work.

This morning I got another nice new part in the post. This time it was an alloy pulley from Rimmers. I'd heard bad things about alloy pulleys in the past. Apparently they used to be all alloy, which resulted in the keyway wearing out because of the softer material. The Rimmers one has a steel sleeve in the middle bolted to an alloy outer. Another bonus is that the bolts look like they might be handy for mounting a timing wheel if I ever want to move to a Megajolt set up in the future!

 The next job was a big one! The gearbox needed to come out so I could replace the engine's rear oil seal. I won't bore you to death with the details of how I got the gearbox out but it did involve a hell of a lot of brute force, wood and jacks. Believe it or not, I did it all on my own too!
 The oil leak had made one hell of a mess. The inside of the bellhousing, bottom of the gearbox and the underside of the car were absolutely caked in oil and dirt!
 The standard cast iron bellhousing weighs nearly as much as a chest freezer! I bought an alloy replacement from Moss last year and started preparing it to fit. It's not the best casting I've ever seen but I think it'll do. I've painted it inside and out and I've gone for grey POR15 this time to show up any oil leaks! It's a very similar colour to my workshop floor!
 The seats are looking good. I've bought another seat foam set from Owen at Park Lane Classics. I haven't had time to do any more work on them though. I'm waiting till the gearbox is out of the way and my workshop is less dirty before I start work on them again!


