Tuesday, February 27, 2007

Bushes

I finally got hold of some pedal bushes from 'jimslittleshop' on ebay. These arrived this morning and I fitted them with a carefull series of blows from a large hammer. I protected the bushes with a block of wood so as not to damage them. The pedals were now looking pretty good!


So then I cleaned up a rusty pivot pin and made sure it was good to go. All that remained to do then was to fit it up in the bracket and bang it through with plenty of oil. Once it was through I locked it with some new E rings I bought last time I went to Canleys. I'm still trying to get hold of the brake pivot pin but the clutch assembly is done now!


I also invested some time ripping out some rear speakers that a previous owner had put in the rear cockpit board. These were fixed in with a ridiculous amount of plastic spacers which (together with speakers) weighed the best part of 2kg. I'm not looking to rid my car of speakers forever but I am planning to fit smaller and more discreete ones under the dash somehow. The ones I removed are actually reference quality Infinity speakers so somebody has obviously spent a fair bit of cash on them. I'm hoping to sell them and replace the rear panel with a carefully cut sheet of aluminium. I might even go as far as sealing it like the firewall of a race car!


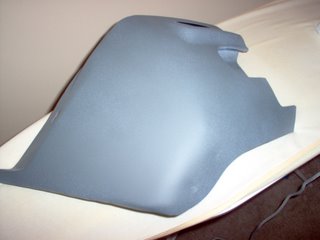
Speaking of firewalls...I'm still getting on with spraying the bulkhead round the master cylinders but I'm not so tempted to go out in the garage while the weather's still this cold!

Thursday, February 22, 2007

New Master Cylinder

I've been pretty busy since my last post! Firstly I took all my drilled out brackets and a whole lot of other stuff to Lap-Tab in Birmingam and told them to sandblast and powdercoat them. They said it'd take a week but gave me a call a few days later and it was all done!


The credit card also took a beating this week at the online shop of Rally Design. I need new master cylinders for both the brakes and the clutch systems as the old ones were worn out. Thinking they'd be available relatively cheaply I checked at all the major suppliers and couldn't find one cheaper than about £60. I then heard of a company that can resleeve the inside of the cylinder (Past Parts) so I emailed them for a quote thinking this might be the cheapest way to sort it out. How wrong I was! The quote was exactly the same as a new cylinder!


So that left only one option really and that was to buy a Wilwood master cylinder from Rally Design. As this is only £30 it's both a cost and spec improvement over the standard stuff - which is a nice change from normal! I wasn't impressed by the postage charges on their website though - I don't think a flat rate of £8.50 is very good to be honest but they did get it sent out quickly.

I went for the Wilwood integrated reservoir cylinder and I will use it for my clutch as the capacity is pretty small and I would like a bit more 'in reserve' for my brakes. Club Triumph forum user '2litre-e' has a nice looking Wilwood cylinder with an external reservoir so I have posted on the forum inquiring about that!

Friday, February 16, 2007

Finally finished drilling!

I've finally finished all the boring drilling. I've now lost weight from the front grille, grille bracket, battery clamp and both the small and large valance brackets. The last three of these I finished today. I rushed off to the podercoaters to get them sorted this afternoon but when I got there I found they'd all gone home at 12.30! At least there's no more drilling to do!

Thursday, February 15, 2007

Lightening Fast!

I had a bit of a rush job on today. I went to Canley Classics this morning to pick up some stuff I needed for the master cylinders. I bought a complete set of mounting bolts, washers and shakeproof washers along with master cylinder gaiters, pivot pins, clips and the pedal pivot E rings. After that I went on to KD Triumph to drop off some wheel embelishers for a mate of Karls that got in touch via the Club Triumph forums. I am clearing my garage out at the moment and have more stuff to give away including a Spitfire 1500 radiator which is available free to anyone who can collect it. It's not the uprated wide type but it works 100%! Get in touch if you want it!

I was also intending to take the master cylinder brackets (and a whole lot of other stuff) into Lap Tab in Birmingham to get them powdercoated. I decided to do it tomorrow instead and spent the evening lightening up a few more bits and peices so they can go off and get coated. Shown below is the brackets that hold the front quater valences on. They are now 20g lighter!


I'm now just left with the smaller quater valance brackets and the battery retaining clamp to drill and then I can relax!

Tuesday, February 13, 2007

Update

Today I got back to work on the area around the master cylinders. I used a wire cup brush on an angle grinder and also on a drill to clean up the area around the wiper motor and the brake cylinder. This area appears to have been suffering for quite some time and is now quite badly pitted. Fortunatly the steel is still strong and I have no worries about the structural strength of the panel.

Having done my best with the wire brushes, I used Hammerite Rust Remover to sort the remaining rust. I'm not particularly impressed with this slimy green mixture but it seems to work alright and is inexpensive. When its gone I will replace it with the equivalent product from Bilt Hamber Laboratories, which I have heard great things about!

I still have the area around the clutch cylinder to wire brush but I sprayed the rest with primer just to minimise exposure to the air while I finish the rest off. This is how it's looking so far...


Another thing I've been getting on with is the drivers side quater valance. This now just needs flatting down and respraying before abrasive polish and then laquer can be applied. It's looking good so far but I'm not sure how close a match the colour is to the rest of the car!

Continuing the theme of modding the front of the car, I also cut the number plate horizontally so that it is the minimum size allowable by law. This means that there is only 11mm between the top of the letters and the edge of the plate. This gives a slight airflow advantage into the radiator because the area of the plate is reduced by 40 square cm. I think it looks better as well and saves 15g!


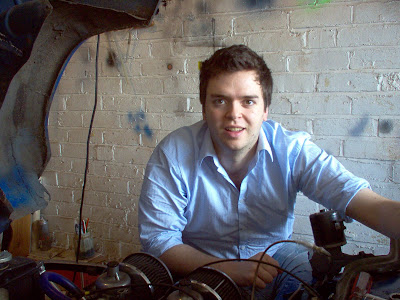
Finally, it also occured to me that I havent yet shown a picture of the T handle that I have fitted to the interior. This will eventually be used to activate a plumbed in fire extinguisher system but for the time being the cable remains curled up in the glovebox. I had initially planned to mount this in the dash but I made up a braket and mounted it just under the dash on the passenger side where the driver can reach it as well!

Sunday, February 11, 2007

More Weight Saving!

Finally got around to loosing some weight out of the boot! At some time in it's life my car had been fitted with carpet covered hardboard on either side of the boot. Over the years this had gone soggy and nasty along with the black vinyl covering the wheel arches. 2 minutes work to rip it all out and a weight saving of 1.5kg for absolutely nothing!

Amusingly there was also a boot light fitted on the right hand side panel that had been fitted in the past and had never worked. On removing the panel I discovered no bulb and loose wires just hanging down the back!

Thursday, February 08, 2007

Quater Valances

I just couldn't bring myself to fit the nice new indicators into the shonky old valances that appeared to have been badly painted with the wrong colour paint! So off came the drivers side to start with and out came the 4 bolts that were holding it on along with the bumper attachment. I then detached the old indicator electrical connections and pulled the whole thing free of the car!

So, after dealing with a seized screw retaining the indicators I was left with just the metalwork. I fired up the angle grinder and stripped the paint off using a wire cup brush. For the edges and finer stuff I used a smaller wire brush in a drill. The reason for the awful cracked paint became pretty clear. It seems that the valance had been crudely painted black before getting a waxy stonechip style coat and then finally a colour coat on top. Naturally a waxy coat like that isn't the perfect base for a colour coat!

When it was in bare metal I noticed a few little knocks that needed fillering so I protected the bare metal with U-Pol Acid primer before giving a few spots a skim of filler. I then gave those areas a good wet and drying afterwards until the areas were super smooth (no perceivable ridge between filler and bare metal). I then recoated with etch primer to give 2 nice and thin coats over the area and when that had dried I smoothed it with fine wet and dry paper and gave it all 2 coats of zinc primer followed by, you guessed it, more wet and dry rubdowns! At that stage it was looking like much better! Check out the spot welds - I could have filled and smoothed them but I like them original!


So I left that to dry overnight and started on it again the next morning. First thing I did was give it a couple of thin coats of regular primer. The zinc stuff isn't very smooth and this helps to give the colour coats a smoother finish. More flatting back followed that and then I could finally get on to the colour! One coat of Tahiti Blue (from a Halfords spray can) and it was now looking like this!

More news next time!

Thursday, February 01, 2007

More Brackets!

Not much to report recently. Still looking after my grandma and making best use of my grandads workshop before he comes out of hospital! Spent the past few days lightening a few things. I know it's not going to make a noticable difference but I do want to have a bit of underbonnet wow factor! My favourite mod so far has to be the two small holes in the radiator cap 'ears'!