Showing posts with label lightening. Show all posts

Saturday, November 22, 2008

Little Jobs

The car's been working pretty decently for the last few weeks and it's given me enough time to concentrate on some of the little jobs that have needed doing for a while!

The first job was to sort out the plastic rear windows. These had suffered from careless hood folding in the past and the effects of being left out in all weathers! I heard a rumour that 'Renovo' was the best thing to use so I bought some of ebay and gave it a go. It got a lot of dirt off and removed a lot of scratches. It also easily removed the sticky remnants of a sticker that had been in the back window. There is a patch that is cloudy and slightly crazed that it couldn't sort out, but other than that the improvement has been remarkable and it makes it much easier to see the car behind in the centre mirror.

The next job was to sort out the boot stay which was getting a bit stiff. This came out and after a clean up and regrease it was working smoothly. I also couldn't resist lightening it up a bit. According to the kitchen scales I've saved around 20g, which is better than nothing I suppose!


My next job is to sort out the boot! The piece of trim that goes over the petrol tank has been remade by a previous owner in some type of hardboard which was ill fitting and has curled up, presumably after getting damp. This really needs to be replaced and then I can mount my CD changer on it with the brackets I made ages ago. Then maybe my CD's wont skip annoyingly all the time!


That's about it really! The car's been faultless for weeks now and I honestly can't remember the last time I opened the bonnet!

Sunday, April 20, 2008

Number Plate

I've been at it again - thinking about my cars aesthetics! My latest purchase is a new number plate for the front of my Spitfire.

I've been messing around with the front of the car since I bought it! When I first got it it came with an absolutely massive plate that blocked off virtually the whole of the radiator grill. Unsurprisingly there were some cooling issues! I'm sure they were largely due to the radiator, which was standard size and looked like it had seen better days, but the huge plate didn't help!

To sort it I fitted a wide radiator and cut the edges of the plates off, leaving the minimum legal distance between letters and the edge of the plates. The cooling problems were sorted but I still wasn't happy with how it looked. There was only so much chopping down I could do with the letters as big as they were (way bigger than the legal minimum size!) and I was left with square edges on each side which looked a bit odd! Something had to be done...

I looked at various options. Stick on plates didn't do it for me. I don't like the way they look mounted almost horizontally on the bonnet. I don't like the look of plates mounted on the spoiler either so that only left me with the option of using a smaller plate in the standard location.

This is where things got a little bit err....complex. In order to get what I wanted I was going to have to bend and break a few laws. Basically, I wanted a 3/4 size plates and these aren't strictly road legal. After doing my homework and looking on a few forums I couldn't find anyone that had been pulled over for having a smaller front plate so I decided to go for it.

This led me to the next problem. Getting number plates made is supposed to involve lots of hassle with ID and proof of ownership and stuff. The way the number plate sellers get around this is by selling plates that are for 'show' only. So without all that hassle I got http://www.fancyplates.com/ to make one up for me. It looks great and arrived the next day. So for good service they get recommended by me!

Thursday, January 10, 2008

Finally! An Update!

Okay so its been a long time coming but here's the first update in quite some time! I've been busy over christmas but not on the car sadly...

I got back from NZ on the 28th of November and since then seeing the girlfriend, christmas and pilot exams have all taken their toll on my spare time but that dosent mean I havent been busy getting a few bits sorted out for the car!
I've always said that that time and money are the two biggest factors in how I work on my car. Sometimes I've got time and no money so I lighten up some stuff or do a few little jobs and sometimes I've got more money than time and I buy some nice shiny bits! I've not had the time recently so the shiny bits have been rolling in!
Here's a few bits and bobs I've recently aquired. First off is something I've been after for a while - an alloy engine backplate. I bought one of these from Dave 'Sideways' Powell a while back but postal incompetance meant that it never arrived so I bought one from Canley Classics the other week.
Wierdly it looks smaller when it's not on the car! Looks nicely made with all the holes in the right place so it gets the thumbs up from me! Not planning to fit it at the moment so I'll probably just chuck it in the parts box untill I can fit it. I'll probably leave it till I replace the clutch and chuck in a lightweight flywheel, race clutch, alloy bellhousing etc etc.

I also thought I'd treat myself to an alloy alternator bracket (again from Canley Classics). I know its not going to save a tonne of weight but it sure does look cool!

I've also had a chance to check out the rocker spacers. I might well take the rocker shaft out and rebuild it while I'm out in NZ to give me something to do on the boring days I'm not flying! I may even take the Dremel out there and smooth and polish the rockers up!

I've also been working on the wheels I bought. It's been an epic mission to strip all the old paint off. There were about four layers and each seemed to be better applied than the last. It took a whole bottle of nitromoors to get it sorted and even then it took an epic amount of time with wire wool and wire brushes to get the final bits of paint off! I'm still finishing them off but one is painted up nicely and the result is pretty good. What do you think?

Of course I had to get some nuts to bolt them up. I will eventually upgrade the studs, but for now I bought nuts to fit the standard size studs. I got them from Speedshack and I can thoroughly recommend them. They knew exactly what they were talking about and got them delivered in double quick time so they get a recommendation from me!

I'm also trying to fit the 'all orange' indicators that 'GT6Steve' sent me from Las Vegas but I've run into a bit of a stumbling block. It seems that the fitment of them to a UK spec spit is not as straightforward as it would seem. The bulb holding back part of the light is bigger than the UK ones so it needs the hole opening up with the trusty Dremel!

And finally a request for help! Anyone know how to remove the standard type of mirrors that come come on a Spitfire? I've only got one on the drivers side and theres a screw sunk into a recess on the back of it but it dosent seem to want to move! Do I have to get at it from the inside of the door?

Friday, February 16, 2007

Finally finished drilling!

I've finally finished all the boring drilling. I've now lost weight from the front grille, grille bracket, battery clamp and both the small and large valance brackets. The last three of these I finished today. I rushed off to the podercoaters to get them sorted this afternoon but when I got there I found they'd all gone home at 12.30! At least there's no more drilling to do!

Tuesday, February 13, 2007

Update

Today I got back to work on the area around the master cylinders. I used a wire cup brush on an angle grinder and also on a drill to clean up the area around the wiper motor and the brake cylinder. This area appears to have been suffering for quite some time and is now quite badly pitted. Fortunatly the steel is still strong and I have no worries about the structural strength of the panel.

Having done my best with the wire brushes, I used Hammerite Rust Remover to sort the remaining rust. I'm not particularly impressed with this slimy green mixture but it seems to work alright and is inexpensive. When its gone I will replace it with the equivalent product from Bilt Hamber Laboratories, which I have heard great things about!

I still have the area around the clutch cylinder to wire brush but I sprayed the rest with primer just to minimise exposure to the air while I finish the rest off. This is how it's looking so far...


Another thing I've been getting on with is the drivers side quater valance. This now just needs flatting down and respraying before abrasive polish and then laquer can be applied. It's looking good so far but I'm not sure how close a match the colour is to the rest of the car!

Continuing the theme of modding the front of the car, I also cut the number plate horizontally so that it is the minimum size allowable by law. This means that there is only 11mm between the top of the letters and the edge of the plate. This gives a slight airflow advantage into the radiator because the area of the plate is reduced by 40 square cm. I think it looks better as well and saves 15g!


Finally, it also occured to me that I havent yet shown a picture of the T handle that I have fitted to the interior. This will eventually be used to activate a plumbed in fire extinguisher system but for the time being the cable remains curled up in the glovebox. I had initially planned to mount this in the dash but I made up a braket and mounted it just under the dash on the passenger side where the driver can reach it as well!

Sunday, February 11, 2007

More Weight Saving!

Finally got around to loosing some weight out of the boot! At some time in it's life my car had been fitted with carpet covered hardboard on either side of the boot. Over the years this had gone soggy and nasty along with the black vinyl covering the wheel arches. 2 minutes work to rip it all out and a weight saving of 1.5kg for absolutely nothing!

Amusingly there was also a boot light fitted on the right hand side panel that had been fitted in the past and had never worked. On removing the panel I discovered no bulb and loose wires just hanging down the back!

Thursday, February 01, 2007

More Brackets!

Not much to report recently. Still looking after my grandma and making best use of my grandads workshop before he comes out of hospital! Spent the past few days lightening a few things. I know it's not going to make a noticable difference but I do want to have a bit of underbonnet wow factor! My favourite mod so far has to be the two small holes in the radiator cap 'ears'!


Monday, January 29, 2007

Brackets

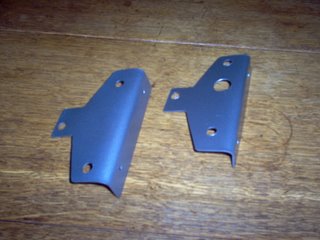
So I've been pretty bored over the last few weeks and have devoted a fair bit of spare time to making up a pair of brackets to hold my CD Changer in the boot. I know that it's heavy and that I really should do without for the benefit of performance but it's still a car I use on the road and I like having a wide range of CD's to choose from!

So I made them from 1mm steel and drilled them to fit the CD changer before bending them in a vice and spraying them with zinc primer, silver wheel paint and then lacquer. I will mount this on the panel inside the boot on the left hand side (to offset the drivers weight and as low as possible to keep the centre of gravity low!)
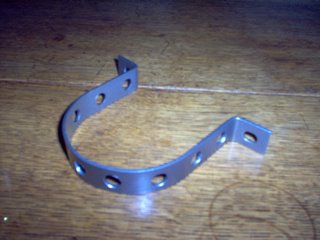
While I was there I also gave the wiper bracket a lick of the same paints. I know it's getting more publicity than it really deserves but here we go with a picture!

Also while I had the drill out I reduced the weight of the overengineered bracket that attaches to the chassis to the front and holds the plastic grill on. I may well drill out the horizontal parts of the grill in the future. Believe me I have a lot of time on my hands!
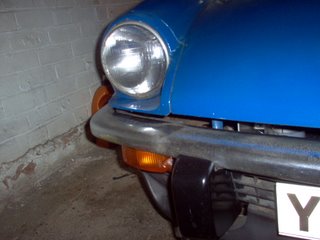
And finally a picture of the indicators. This was just a test fitting to see how they would look on the front of the car. Readers opinions are most welcome but I personally think they look great. The US light units are lighter than the standard ones, give me bigger indicators and will raise the sidelights up into the headlights. Hopefully this will mean more people will see me and should make driving it a bit safer!

Thursday, January 11, 2007

Wiper Motor Bracket

I've recently been spending a lot of time looking after my Grandma while my Grandad's been in hospital so I've spent the time making the best use of Grandads workshop. Inkeeping with my lightweight theme (and whilst I had it off to strip the bulkhead) I whizzed up this lightweight wiper motor strap (15g). Okay so it only saves a few grammes but it looks pretty neat!

There is also good news on the clutch pedal. I dropped it into a small garage in Caldmore where the chap it going to weld up the hole so I can redrill it. Should save me fractions of a second with every gearshift!

Saturday, December 30, 2006

Christmas Brake!

So I rolled the Spitfire out onto the drive, opened the bonnet and got a christmas suprise! And not a good one!

I was lacking a huge amount of clutch and brake fluid. So I topped up and had another look today and the area around the brake master cylinder is damp. The paint was flakey before and it's not going to get much better with fresh fluid pouring all over it! My plan is to rebuild (and possibly replace) both cylinders. I had previously replaced all brake and clutch parts except the clutch pipe and the master cylinders so I guess its about time! I thought I'd also take the time to repaint the bulkhead and sort out the pedals. I've finally managed to separate the 'Cross Shaft' and wasn't suprised it was so difficult to drift out - it had been put in dry and had just rusted in solid.

Of course I thought I'd improve things while I'm tinkering. I plan to replace the clutch pipe with a braided flexable version and to paint the finished cylinders black to aid heat dissipation. I have also chucked out the worn out pedal rubbers (60g) and replaced them with griptape. This is the stuff I used on my wakeskates and it's super hardwearing, waterproof and weighs so little I couldn't measure it on the scales! Not the biggest weight saving in the world but it all adds up!

Friday, July 28, 2006

Throttle pedal


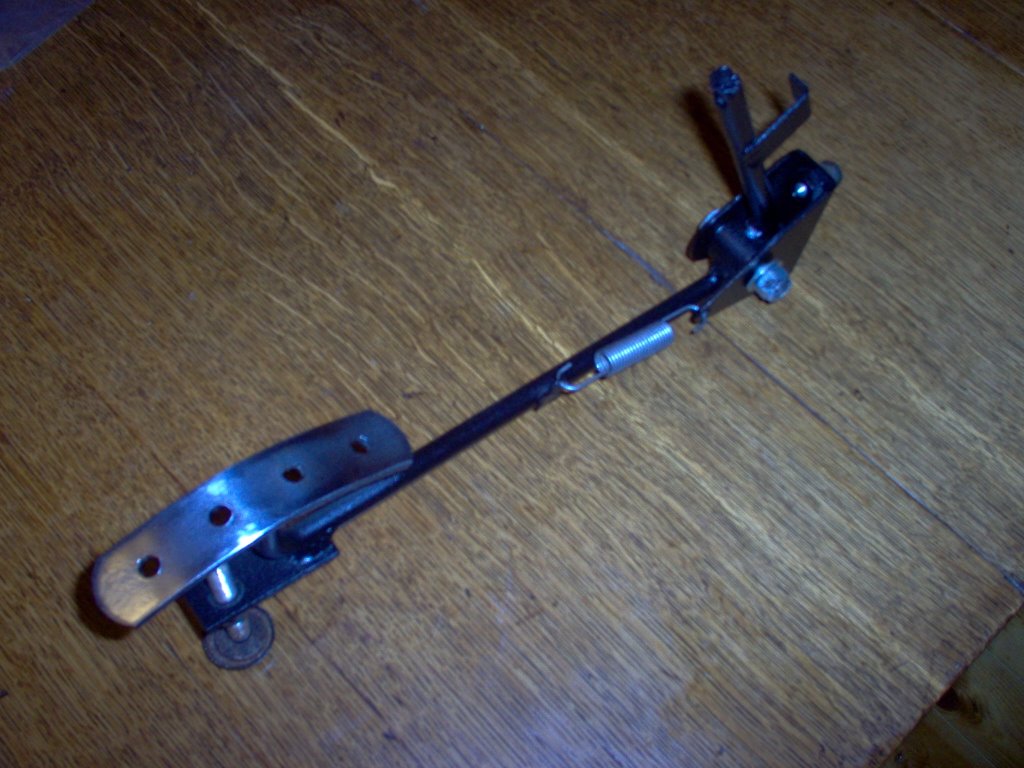
With the car at Karl Dandridge Triumph I don't have anything to play with, so I decided to clean up and repaint an accelerator pedal I bought of Ebay a few days ago. It struck as I was sanding it that it was suprisingly heavy and could be easily lightened with a few holes here and there. I was aiming to keep it looking 'factory' so I didn't make the holes too large! A few hours later and it was looking good in matt black with the face of the pedal sanded smooth and laquered (although it remains to be seen how long that'll last!).