Sunday, January 25, 2009

Looks Like I'm Going To Be Busy...

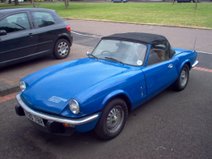
I've decided to enter the Club Triumph 'Historic Counties Run'. This year it's a coast to coast event that starts by the sea in Surrey and finishes, 14 hours later, on the Welsh coast. Apparently this will be a minimum of 400 miles. Combined with the journey down from the Midlands and the journey back it's probably going to be a minimum of 700 miles.
In order to cope with that kind of distance my car's going to need to be a bit more reliable! I've got no doubt that my car's in good enough condition to make it but I would like to fix the niggling little problems that've been really bugging me over the last few months. Unfortunatly the list of problems is not a small one!
Firstly there's the fueling. The carbs are worn which is leading to a very high idle. This is not exactly good for fuel consumption and neither is the repro fuel pump which is overpowering the valves in the carbs, letting fuel spray out under the bonnet. Obviously economy and safety are pretty important to me so it's vital to get this sorted before the run. The carbs need to see an expert and they will be going to Andrew Turner to be rebushed. The fuel pump is likely to be replaced with a pump from a TR7. Apparently these fit and don't produce too much pressure like the standard repro Spitfire pumps - the only difference is the position of the inlet and outlet. If replacing the pump dosen't work, I'll go electric and get an SU fuel pump mounted in the boot.
Secondly there's the heating. Not having a working heater or temperature gauge has been pretty annoying over winter! I started on this today. The heater valve was seized solid and no amount of penetrating oil was going to free it off! That was taken off and a replacement ordered from Rimmer Bros. A pressure washer was taken to the cooling system and I soon had the silt cleared out of the heater matrix. There was plently of it! The other problem was the temperature guage not showing the right temperature. I tested the guage by earthing the wire to the temperature sender against the block. This caused the guage to move upwards, revealing the sender to be at fault, so ordered a new one.
The third problem is the clutch. This is one I've been putting off for ages. The engine needs to come out so I can replace a weeping rear oil seal so I might as well replace the clutch while I'm there. The hydraulics are also leaking so I'll do that whilst I'm at it. I'm a bit annoyed with the hydraulics, in all honesty. The hose, slave and master cylinder are all new and it looks like the leaking has been caused by swarf from one of them damaging the master cylinder seals.
Then there's all the little problems. I need to drain and replace the diff oil, give the car a service and I need to Rain-X the windows and fit better wipers. Another thing I need to do is to adjust the headlamps properly and make sure they're able to stay on full beam for a prolonged period of time. Last time I used full beam in anger it overheated a contact and left me with no headlights on a dark country lane. Not something I want to do again!
If I've still got time I'm going to fit some AVO's and a lowering block to the rear.
One things for sure. I've got my work cut out for the next few months...

Sunday, January 18, 2009

Engine Valances - Part Three

This is turning into one of those projects that I wish I'd never started! Today I made my final design templates and started translating them into aluminium. There is finally light at the end of the tunnel!

Tuesday, January 13, 2009

Engine Valances - Part Two

Much fettling of the drivers side valance has been going on this evening in order to improve the fit. I'm still a long way from happy with it and I haven't even got around to designing the heatshield for the carbs which I want to include, but things are coming along nicely at long last!

I took a pretty methodical approach and bolted the cardboard template in place. I was then able to use the fixing bracket as a datum point - this allowed me to combine the template of the valance with a profile template of the bulkhead that I made earlier. The result is that the template follows the profile of the bulkhead really nicely with only a 2-3mm gap between. The same is true with the cut outs for the air filters. Now I've got that sorted I'd really like to tighten up the gaps at the front and around the suspension and sort out what's going to happen at the lower edge.

And finally a picture of the brackets where these valance mount up. These take two bolts and are located 1 3/4 inches above and 1/8 of an inch inboard of the body mounting bracket.

Sunday, January 11, 2009

Engine Valances - Blue Peter Style!

One of my winter projects is to make a set of engine valances. I want them because I think they might keep the engine a bit cleaner and also because I want to have something to attach an oil catch tank to!
First of all I started by ordering some material. I've got a few other projects in mind that are going to need some aluminium so I ordered a metre squared of 2mm aluminium from a supplier on Ebay.

Then I started thinking about the valances themselves. When I made my radiator valances I used the old cardboard ones as a template. This time I wasn't going to be so lucky! I've never had a set of engine valances on my car so I was going to have to start from scratch. I started off by looking at Paul Tegler's excellent website (http://www.teglerizer.com/triumphstuff/spitenginepanels.htm) and decided to make some panels up in cardboard to see if they'd fit!

Fortunately the recent purchase of a couple of heaters meant we had a few cardboard boxes lying around that were perfect for this sort of thing! I started off by marking out the cardboard as per the instructions. I noticed a slight problem straight away. There is no length given for the distance between points A and B. It was only a minor part of the overall design so I left it - the beauty of cardboard is that things can always be adjusted to fit later!


Once I'd marked it all up I set about cutting it out using an X - Acto style knife. This is much easier than using scissors and leaves a much nicer edge. I took the template out to the car and offered it up.

Straight away it didn't look quite right. There was a 2 inch gap between the bulkhead and the valance and I couldn't work out what the hell the circular cut out in the bottom was for! I'm ashamed to say it was quite some time before I realised the (now) blindingly obvious and turned it the right way around! Thanks to Neil (neilnaz) on the CT forum for the picture he posted to show me how the valance mounts up - it helped me realise where I'd gone wrong.

I had presumed the longer bit would be at the back but that is not the case! With the panel the right way round it was obvious that the circular cut out was for the steering rack. The only thing that wasn't quite right was the front part where the template meets the radiator frame. The angle of the frame on mine seems to be a bit 'non standard'. Other than that though it fits great! I do need to sort out the top edge though. It's going to need some material removing to allow the air filters to fit!

Feeling flushed with success I set about building another template for the other side.

This was a much less brilliant fit! I don't know quite what the hell went wrong but basically it just looks ridiculous! I couldn't find any errors in my template so I guess it's just the plans. At least I tried it out on the cardboard first! It's quite possible that I've made a huge and very comical error so if anyone out there knows where I went wrong, please let me know!


Luckily the good template from the other side seems to fit perfectly on this side too so I think I'm probably going to just make two identical ones.

Saturday, January 10, 2009

More Tool Cabinet Stuff!

I bought the top box for my roll cab yesterday. I couldn't help myself! I was amazingly lucky because I got there just as they were changing all their prices and the price of it dropped £30 while I was in the shop! Because of the current financial crisis it seems like you can't pay full price anywhere - even if you want to!

Sunday, January 04, 2009

New Kit!

I suprised myself today! I'd been mulling over the idea of getting some more storage for my tools for a while but I hadn't really been actively searching for something!

A bit of christmas cash and a the timely arrival of the Machine Mart catalogue changed all that though! I had a look on the website and noticed an Clarke roll cabinet for just over £100. Thinking that this was too good to be true, I popped into my local shop to take a look at it. It looked good from the outside but after pulling a drawer out I realised that the quality was not all that good - especially when compared to the more expensive 'HD Plus' range.

I thought about it and weighed up the options. Eventually my mum persuaded me that I wouldn't be able to put up with the rubbishy drawers and the thin metal of the basic cabinets and that I should look at the more upmarket ranges! While browsing I spotted a 'Blue Line HD Plus' 3 draw cabinet that seemed to tick all the boxes. Solid build quality and roller bearing drawers had me convinced. What finally pursuaded me was the £50 that that they had taken off the price due to a slight dent on one side. It's a very shallow dent that is just under where the side handle attaches. It hasn't even gone through the powdercoat and I reckon it'll fix up just fine!

There was just one small cock up! The keys were in the top drawer and during the car journey home they managed to find their way into the bottom locker which just happened to be locked! Luckily, the drawers are removable and I when I eventually realised that, I was able to retrieve them fairly easily!


Saturday, January 03, 2009

Garage News!

If you're a regular reader of my blog you might be wondering what I've been up to lately! Sadly, as the Spitfire is concerned, the answer is not much! It has been left out on the drive in all weathers recently. I've got a new job working for the NHS and have spent most of the last month either working hard or visiting friends and family.

It has also been a victim of my garage renovation project! This started off as a quick project to paint the floor with some nice garage floor paint but soon started becoming much more involved! Cleaning the floor took ages because scrubbing off 50 years of soaked in oil and brake fluid isn't an easy task! I ended up painting the floor in sections and moving stuff around to clear the next area to clean and paint. It worked rather well and after that was completed I thought it looked pretty good. The only trouble was that it showed up exactly how bad the paint on the walls was, so I had to get the brushes and paint out again!
Moving stuff round while doing the painting made me realise that I didn't have any storage for anything whatsoever! There were loads of oversize tools lying around that were too big for my tool cabinet. To sort that out I made a tool hanging rack from a sheet of MDF that was lying about. This is fastened to the wall with screws and the MDF is just about soft enough to screw hooks into by hand.
That's about as far as I've got so far. There's still lots more to do. There's loads of wood that could do with being stored elsewhere and I'm still waiting on the rack mount storage bins that I'm going to mount on the wall for small parts storage. I've actually cleared enough space to get the car back in so I'm feeling very pleased with myself at the moment!


I was soon feeling less pleased with myself when I realised the brake pedal went completely to the floor! I suppose at least now I've got something to do in my garage!
I'd also like to hand out some thanks to the various people from Club Triumph who suggested ideas for my garage and workshop on the 'Show us yours' and 'Garage/Workshop' threads. There were loads of useful suggestions and plenty of good ideas that have or are in the process of becoming a reality!