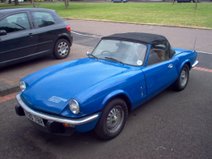


I'm getting better at these small welding jobs! I've discovered that the secret to really neat welds is accurate 'fit up'. Time spent making the repair sections fit definitely pays off when it comes to the welding!
I still need to sort out the bonnet cone mounting panels at the back edge of the bonnet. For the time being I'm leaving these on to help with aligning the wings but they'll eventually be replaced. Thanks to eBay, Canleys and a couple of panels I got donated from a failed restoration, I've almost got all the panels I need and I should be able to start the rebuilding process soon.
Another project I've been working on recently is a tool trolley. I'm still waiting on a few panels so I thought I'd fill the time by making a tool trolley. Basically these are wheeled carts used to store parts and tools while working. You can buy them, but they either seem to be cheap and a bit rickety looking or solidly built but expensive. I wasn't after anything fancy but I did want a well built, stable cart and I wanted it to be a bit higher than normal because I'm tall! I also thought about building in a power strip so I can plug all the power tools onto the trolley and then just plug the trolley in. Sounds like a good idea, huh?
I started by cutting up some 25mm box section with my new Evolution 'Fury' saw (a recent purchase on a 'VAT free' day at Machine Mart). I'm using 1.5mm wall thickness to keep it light.


The trickiest bit so far has been the handle! I used a holesaw in a drill press to make the tube fit against the box section sides of the handle. This worked a treat and all I had to do was cut the angles on the chop saw and weld it up.


 It's coming on nicely! Thanks to eBay, I have some decent size lockable castors and thanks to Banbury Plastic Fittings (www.bpfittings.co.uk) I have the inserts that the castors bolt up to and various plastic plugs to seal the ends of the tubes. I was quite pleased to find this company, as everywhere else seemed to have a minimum order quantity or was only open to the trade.
That's it so far! I'll let you know how it turns out in a future blog post!


No comments:
Post a Comment