Sunday, February 22, 2009

Heater Valve Fun!

I haven't actually managed to achieve much this week because I've been off on a holiday with my other half in the lake district, but I have made some steady progress on a number of fronts!

One of my biggest achievements this week has been removing part of the heater valve. I bought a new heater valve a few weeks back and when it arrived I found out that they don't come with the brass part where the heater hose attaches. Fortunately this was still attached to my old one. Unfortunately it was solidly attached by a bolt with a snapped off head and mangled threads and, even worse, a scan of the parts catalogues revealed it was NLA!


I attempted the usual methods of removing it. Firstly I tried mole grips but they didn't work. Then I tried hacksawing a groove in the top and using an offset screwdriver. That didn't work either so more drastic measures were called for! I set about drilling the valve out around the thread and eventually I managed to get it turning with the mole grips. With that done I dropped the part in some white vinegar and wire brushed it a few hours later. Good as new!
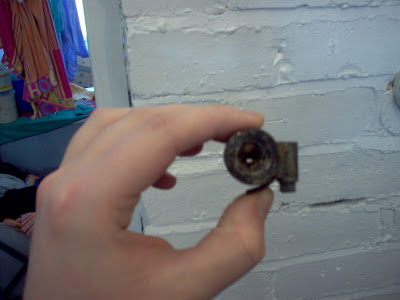
When I was drilling the old heater valve out to free the threads something very strange happened. The top hose pulled away from the top of the valve body taking the top part of the valve with it. This revealed a strange powdery but also jelly like substance that was completely blocking the pipe. It was a bit green and coppery but also a little like the jelly in pork pies in places! I tried to get some pictures but it didn't show up too well. Weird stuff!


I had a package waiting for me when I got back from my holiday - a nice Nippon Denso starter motor that I bought off ebay. I is supposed to be for a Toyota Supra but I'm planning to use it on my triumph with the kit from Canleys. Watch this space!


I've also finally got some small parts storage. This is going to speed things up in the garage a lot! No more fumbling through numerous boxes for me!

Sunday, February 15, 2009

Degrease and Deoil!

I've got a few little jobs done this weekend. Firstly I cleaned up the bulkhead. Parts of this were covered in decades of grease, dirt and dist. I used a mountain bike degreaser called 'Muc Off'. They do a whole range specifically for cars now but I've always used the mountain bike stuff on my car and it works really well. With the crud removed there was plenty of light surface rust revealed and even a little paint in places. The battery box is basically sound though, which is very good news!

The other job I got through this weekend was draining the oil from the diff. This was the first time I'd ever done this job on the triumph and I'm pleased to say it went okay! The main problem is that triumph were too penny pinching to fit a drain plug so you have to use a small tube through the filler plug to empty the old oil out. I used a small siphon style hand pump. I just stuck the pipe in the diff, pumped the oil through to get it going and then waited for it to slowly siphon out. Imagine my surprise when I discovered that nearly as much oil came out as should have been in there!


Now I just need to pump some new oil back in. Can anyone out there recommend a good oil for a hard working diff?

In other news this week - The Spitfire Graveyard got back to me saying they'd got a decent heater. Haven't had time to call them back yet, though! Also, I got onto Moss Europe about my alloy bellhousing and found out its going to be with me in a few weeks. That's something to look forward to! Then I can get on with getting the engine out and replacing the clutch.

Sunday, February 08, 2009

Slow Progress

I can't understand what's going on with people selling car parts these days! We're heading towards the mother of all recessions and it seems like some people can't even be bothered to return an email to make a sale! My search for a heater box has been fruitless so far because of this kind of apathy. I've emailed 3 ebay sellers and one second hand parts company to make enquiries and only got one reply (from an ebayer) and that wasn't good news! I've just sent an email off to the Spitfire Graveyard so hopefully they'll be able to help me out.

I'm also still waiting on orders from Canley's and Moss. I suspect that the snow hasn't helped things this week but I'd really like some parts to arrive soon. There's a lot to do before the HCR and I'd like to get the big jobs out of the way as soon as possible!

In the meantime, I've been messing about with various other things. Inspired by Chris Marsh (http://ukcjmspitfire.blogspot.com/) I have drilled out my heater controls. It's always good to lighten things up where you can and this is a really thick piece of metal which is perfect for this type of 'swiss cheesing'! Saved 20 grams on the stock weight.

I've also taken the heater valve bracket off. I was going to bid for a stainless one on ebay to replace it but I missed the end of the auction so I figured I'd bend the old one back into shape and lighten it. I didn't touch it around the top, where it's pretty flimsy but the base, side and front got a drilling. It's lighter by 15 grams and it looks pretty good! It just needs deburring and powdercoating to be perfect!


Tune in again next time for some much bigger and much more expensive weight savings!

Sunday, February 01, 2009

Heaters and Carbs!

I've had quite a busy weekend. I removed a whole stack of stuff from my car. The carbs came off first. I took them off complete with the manifold so that they can be posted off to Andrew Turner later on in the week. I spoke to him on the phone earlier on in the week and we had a good chat. He's going to take a look at them for me and get back to me to let me know what needs doing!
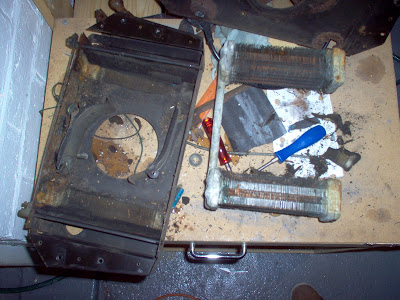
I also got going on fixing the heater. The controls for the temperature were completely seized so I started tracking down the problem. The heater lever assembly and the cable were okay (but a bit stiff and grubby) so the problem had to be the water valve. It was beyond repair so I ordered another. Then I started looking at the 'heat distribution' lever. This is supposed to direct the heat either to the footwell or onto the windscreen. This was seized solid as well but I couldn't see exactly what the problem was without getting the heater box out of the car.


Getting the heater box out wasn't as hard as I was expecting. All you need to do it to get the passenger glove box out, disconnect the heater, undo the bolts and then slip it out. I immediately noticed why the lever wasn't working. The linkage at the bottom of the heater had snapped off where the cable attaches. It could do with a new heater box as it's gone a bit rusty around where the pipes enter but at least the heater matrix looks to be in pretty decent condition. The heater motor is in tip top condition too which is a relief!

While I was mulling over what to do with the heater I removed the fuel pressure regulator. Hopefully this won't be needed when I get a new fuel pump that delivers the right pressure! I also spent some time ordering parts this week. A new heater valve showed up from Rimmer Bros on Thursday along with a thermostat, rear oil seal, gaskets and a kit that reduces gear lever 'rattle'. I also ordered an alloy water pump housing from Canley Classics that should be with me by the end of next week. I've decided not to go with an electric water pump on the grounds that I want to keep things simple so alloy will be the way forward for me!

Sunday, January 25, 2009

Looks Like I'm Going To Be Busy...

I've decided to enter the Club Triumph 'Historic Counties Run'. This year it's a coast to coast event that starts by the sea in Surrey and finishes, 14 hours later, on the Welsh coast. Apparently this will be a minimum of 400 miles. Combined with the journey down from the Midlands and the journey back it's probably going to be a minimum of 700 miles.
In order to cope with that kind of distance my car's going to need to be a bit more reliable! I've got no doubt that my car's in good enough condition to make it but I would like to fix the niggling little problems that've been really bugging me over the last few months. Unfortunatly the list of problems is not a small one!
Firstly there's the fueling. The carbs are worn which is leading to a very high idle. This is not exactly good for fuel consumption and neither is the repro fuel pump which is overpowering the valves in the carbs, letting fuel spray out under the bonnet. Obviously economy and safety are pretty important to me so it's vital to get this sorted before the run. The carbs need to see an expert and they will be going to Andrew Turner to be rebushed. The fuel pump is likely to be replaced with a pump from a TR7. Apparently these fit and don't produce too much pressure like the standard repro Spitfire pumps - the only difference is the position of the inlet and outlet. If replacing the pump dosen't work, I'll go electric and get an SU fuel pump mounted in the boot.
Secondly there's the heating. Not having a working heater or temperature gauge has been pretty annoying over winter! I started on this today. The heater valve was seized solid and no amount of penetrating oil was going to free it off! That was taken off and a replacement ordered from Rimmer Bros. A pressure washer was taken to the cooling system and I soon had the silt cleared out of the heater matrix. There was plently of it! The other problem was the temperature guage not showing the right temperature. I tested the guage by earthing the wire to the temperature sender against the block. This caused the guage to move upwards, revealing the sender to be at fault, so ordered a new one.
The third problem is the clutch. This is one I've been putting off for ages. The engine needs to come out so I can replace a weeping rear oil seal so I might as well replace the clutch while I'm there. The hydraulics are also leaking so I'll do that whilst I'm at it. I'm a bit annoyed with the hydraulics, in all honesty. The hose, slave and master cylinder are all new and it looks like the leaking has been caused by swarf from one of them damaging the master cylinder seals.
Then there's all the little problems. I need to drain and replace the diff oil, give the car a service and I need to Rain-X the windows and fit better wipers. Another thing I need to do is to adjust the headlamps properly and make sure they're able to stay on full beam for a prolonged period of time. Last time I used full beam in anger it overheated a contact and left me with no headlights on a dark country lane. Not something I want to do again!
If I've still got time I'm going to fit some AVO's and a lowering block to the rear.
One things for sure. I've got my work cut out for the next few months...

Sunday, January 18, 2009

Engine Valances - Part Three

This is turning into one of those projects that I wish I'd never started! Today I made my final design templates and started translating them into aluminium. There is finally light at the end of the tunnel!

Tuesday, January 13, 2009

Engine Valances - Part Two

Much fettling of the drivers side valance has been going on this evening in order to improve the fit. I'm still a long way from happy with it and I haven't even got around to designing the heatshield for the carbs which I want to include, but things are coming along nicely at long last!

I took a pretty methodical approach and bolted the cardboard template in place. I was then able to use the fixing bracket as a datum point - this allowed me to combine the template of the valance with a profile template of the bulkhead that I made earlier. The result is that the template follows the profile of the bulkhead really nicely with only a 2-3mm gap between. The same is true with the cut outs for the air filters. Now I've got that sorted I'd really like to tighten up the gaps at the front and around the suspension and sort out what's going to happen at the lower edge.

And finally a picture of the brackets where these valance mount up. These take two bolts and are located 1 3/4 inches above and 1/8 of an inch inboard of the body mounting bracket.

Sunday, January 11, 2009

Engine Valances - Blue Peter Style!

One of my winter projects is to make a set of engine valances. I want them because I think they might keep the engine a bit cleaner and also because I want to have something to attach an oil catch tank to!
First of all I started by ordering some material. I've got a few other projects in mind that are going to need some aluminium so I ordered a metre squared of 2mm aluminium from a supplier on Ebay.

Then I started thinking about the valances themselves. When I made my radiator valances I used the old cardboard ones as a template. This time I wasn't going to be so lucky! I've never had a set of engine valances on my car so I was going to have to start from scratch. I started off by looking at Paul Tegler's excellent website (http://www.teglerizer.com/triumphstuff/spitenginepanels.htm) and decided to make some panels up in cardboard to see if they'd fit!

Fortunately the recent purchase of a couple of heaters meant we had a few cardboard boxes lying around that were perfect for this sort of thing! I started off by marking out the cardboard as per the instructions. I noticed a slight problem straight away. There is no length given for the distance between points A and B. It was only a minor part of the overall design so I left it - the beauty of cardboard is that things can always be adjusted to fit later!


Once I'd marked it all up I set about cutting it out using an X - Acto style knife. This is much easier than using scissors and leaves a much nicer edge. I took the template out to the car and offered it up.

Straight away it didn't look quite right. There was a 2 inch gap between the bulkhead and the valance and I couldn't work out what the hell the circular cut out in the bottom was for! I'm ashamed to say it was quite some time before I realised the (now) blindingly obvious and turned it the right way around! Thanks to Neil (neilnaz) on the CT forum for the picture he posted to show me how the valance mounts up - it helped me realise where I'd gone wrong.

I had presumed the longer bit would be at the back but that is not the case! With the panel the right way round it was obvious that the circular cut out was for the steering rack. The only thing that wasn't quite right was the front part where the template meets the radiator frame. The angle of the frame on mine seems to be a bit 'non standard'. Other than that though it fits great! I do need to sort out the top edge though. It's going to need some material removing to allow the air filters to fit!

Feeling flushed with success I set about building another template for the other side.

This was a much less brilliant fit! I don't know quite what the hell went wrong but basically it just looks ridiculous! I couldn't find any errors in my template so I guess it's just the plans. At least I tried it out on the cardboard first! It's quite possible that I've made a huge and very comical error so if anyone out there knows where I went wrong, please let me know!


Luckily the good template from the other side seems to fit perfectly on this side too so I think I'm probably going to just make two identical ones.

Saturday, January 10, 2009

More Tool Cabinet Stuff!

I bought the top box for my roll cab yesterday. I couldn't help myself! I was amazingly lucky because I got there just as they were changing all their prices and the price of it dropped £30 while I was in the shop! Because of the current financial crisis it seems like you can't pay full price anywhere - even if you want to!

Sunday, January 04, 2009

New Kit!

I suprised myself today! I'd been mulling over the idea of getting some more storage for my tools for a while but I hadn't really been actively searching for something!

A bit of christmas cash and a the timely arrival of the Machine Mart catalogue changed all that though! I had a look on the website and noticed an Clarke roll cabinet for just over £100. Thinking that this was too good to be true, I popped into my local shop to take a look at it. It looked good from the outside but after pulling a drawer out I realised that the quality was not all that good - especially when compared to the more expensive 'HD Plus' range.

I thought about it and weighed up the options. Eventually my mum persuaded me that I wouldn't be able to put up with the rubbishy drawers and the thin metal of the basic cabinets and that I should look at the more upmarket ranges! While browsing I spotted a 'Blue Line HD Plus' 3 draw cabinet that seemed to tick all the boxes. Solid build quality and roller bearing drawers had me convinced. What finally pursuaded me was the £50 that that they had taken off the price due to a slight dent on one side. It's a very shallow dent that is just under where the side handle attaches. It hasn't even gone through the powdercoat and I reckon it'll fix up just fine!

There was just one small cock up! The keys were in the top drawer and during the car journey home they managed to find their way into the bottom locker which just happened to be locked! Luckily, the drawers are removable and I when I eventually realised that, I was able to retrieve them fairly easily!


Saturday, January 03, 2009

Garage News!

If you're a regular reader of my blog you might be wondering what I've been up to lately! Sadly, as the Spitfire is concerned, the answer is not much! It has been left out on the drive in all weathers recently. I've got a new job working for the NHS and have spent most of the last month either working hard or visiting friends and family.

It has also been a victim of my garage renovation project! This started off as a quick project to paint the floor with some nice garage floor paint but soon started becoming much more involved! Cleaning the floor took ages because scrubbing off 50 years of soaked in oil and brake fluid isn't an easy task! I ended up painting the floor in sections and moving stuff around to clear the next area to clean and paint. It worked rather well and after that was completed I thought it looked pretty good. The only trouble was that it showed up exactly how bad the paint on the walls was, so I had to get the brushes and paint out again!
Moving stuff round while doing the painting made me realise that I didn't have any storage for anything whatsoever! There were loads of oversize tools lying around that were too big for my tool cabinet. To sort that out I made a tool hanging rack from a sheet of MDF that was lying about. This is fastened to the wall with screws and the MDF is just about soft enough to screw hooks into by hand.
That's about as far as I've got so far. There's still lots more to do. There's loads of wood that could do with being stored elsewhere and I'm still waiting on the rack mount storage bins that I'm going to mount on the wall for small parts storage. I've actually cleared enough space to get the car back in so I'm feeling very pleased with myself at the moment!


I was soon feeling less pleased with myself when I realised the brake pedal went completely to the floor! I suppose at least now I've got something to do in my garage!
I'd also like to hand out some thanks to the various people from Club Triumph who suggested ideas for my garage and workshop on the 'Show us yours' and 'Garage/Workshop' threads. There were loads of useful suggestions and plenty of good ideas that have or are in the process of becoming a reality!

Tuesday, November 25, 2008

More NEC Classic Car Show Pictures


Richard Hammonds Ford Mustang


KTM Crossbow

Saturday, November 22, 2008

Little Jobs

The car's been working pretty decently for the last few weeks and it's given me enough time to concentrate on some of the little jobs that have needed doing for a while!

The first job was to sort out the plastic rear windows. These had suffered from careless hood folding in the past and the effects of being left out in all weathers! I heard a rumour that 'Renovo' was the best thing to use so I bought some of ebay and gave it a go. It got a lot of dirt off and removed a lot of scratches. It also easily removed the sticky remnants of a sticker that had been in the back window. There is a patch that is cloudy and slightly crazed that it couldn't sort out, but other than that the improvement has been remarkable and it makes it much easier to see the car behind in the centre mirror.

The next job was to sort out the boot stay which was getting a bit stiff. This came out and after a clean up and regrease it was working smoothly. I also couldn't resist lightening it up a bit. According to the kitchen scales I've saved around 20g, which is better than nothing I suppose!


My next job is to sort out the boot! The piece of trim that goes over the petrol tank has been remade by a previous owner in some type of hardboard which was ill fitting and has curled up, presumably after getting damp. This really needs to be replaced and then I can mount my CD changer on it with the brackets I made ages ago. Then maybe my CD's wont skip annoyingly all the time!


That's about it really! The car's been faultless for weeks now and I honestly can't remember the last time I opened the bonnet!

Saturday, November 15, 2008

NEC Classic Car Show

I’ve just got back from the Classic Car Show at the NEC. This is one of the biggest shows in the calendar and this was the first time I’d ever been. Initially I was pretty apprehensive about going. For a start it was going to be expensive for two of us (£17 each plus £8 parking) and, with Top Gear on as well, the traffic was going to be terrible. After spending a little bit too long queuing on the M42, parking and walking to the exhibition halls we started looking around.

First thing that hit me was the sheer size of this show! This is a huge show. There were four halls worth of cars, traders, tools and general stuff! I thought the best place to start would be the first hall so I headed down there and took a look around. There were plenty of nice cars and plenty of Triumphs! All the Triumph clubs were in the first hall and there were plenty of fine examples on their stands. Club Triumph, the TSSC, the TR Register, Stag Owners Club and the Dolomite Club were all in attendance. The CT stand had a particularly polished example of a Spitfire 1500 on show along with a Spit 6 with Emerald EFI, a saloon and a Herald estate. There was a very interesting exhibit on the TR Register stand. They had a shell in ‘pre restored’ condition. It was held together by mole grips!


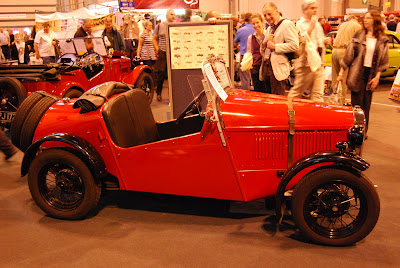
This (above) was a particularly interesting Peugeot special. The name of it loosely translated as 'hold on'! It was built along the lines of British specials with a sports body dropped on top of saloon running gear. It was very cool!


There were plenty of interesting cars from other marques too. The Meguiars stand was particularly good. There were also plenty of nice Mercedes. One I noticed had an original Becker Mexico radio which is probably worth a good proportion of what my entire car’s worth! I’m a big fan of American muscle cars and drag racing cars and there were plenty in the form of Chevy Camaros and Ford Mustangs along with various other hot rods, gassers and other drag racing stuff. I'm also a huge fan of vintage cars and Austin 7's in particular. My grandad built a special in the 60's and there were an interesting couple of specials on the Midland Austin 7 Club stand.


The ticket also got us into the MPH show hall next door. This had loads of modern cars and the Autoglym concours. There was a Napier Railton (picture below), a Ford Mustang belonging to Richard Hammond and a stunning AC Cobra entered in the concours along with a Fiat 500! The rest of the hall had the usual Lamborghinis, Ferraris and Porches. There was even a Gemballa tuned Porsche Cayenne that was finished in satin black.
There were also various cars that had been in the Gumball 3000 this year. Each were stickered up with a numerically challenged decal announcing ‘1999 to 2008 - Ten Years of the Gumball Rally’! Another car that caught my eye was the KTM Crossbow. This is a very different looking in reality compared to the pictures I’ve seen in magazines. It’s absolutely wild!

These are the pictures my mum took. I took my brothers camera and unfortunately don't have the data cable until he comes home next week so stay tuned for more pictures at a later date...

Thursday, November 13, 2008

Fly Off Handbrake Conversion

One of the things I've been wanting to do for a while now is to fit a 'fly off' type handbrake. Obviously, there's nothing wrong with the standard arrangement, it's just that I prefer the way the 'fly off' type works.

So I started off by looking at the options. Early Spitfires came with this type of handbrake as standard, so I could get one of those or I could modify the one I had. I took a look at http://asciimation.co.nz/pics/flyaway/ which illustrates how to convert an MG handbrake. In theory it's relatively straightforward to convert from one system to the other. The only difference is that on a normal handbrake the rod with the button attached connects above the pivot point on the pawl whilst on a 'fly off' it attaches below the pivot point.

With this in mind I took off the old handbrake to see if it would be possible to convert it. Unfortunately the Spitfire 1500 uses a linkage where the rod arrangement hooks around the pawl at the top and there isn't any way to change it.

With that in mind I set about looking for an early Spitfire handbrake. These seem to be impossible to get from my normal parts suppliers but Ebay turned up a nice but chronically overpriced example. With time of the essence I just spent the cash! A couple of days later I my neighbour came round with a package and I could finally see if it would fit!

At first glance it looked almost exactly the same as the Spitfire 1500 arrangement, the only difference being that the grip part on the 1500 goes up at a slight angle whilst the early one is straight. I thought I might be lucky enough to be able to do a straight swap but it was not to be! With the cable fitted nicely and everything else looking okay I realised that I couldn't seem to refit the pivot pin. I realised the problem was the ratchet part of the mechanism not being in quite the right position so I tried moving it about with a screwdriver and various other things with no luck. It then dawned on me that something was obviously wrong and it might not be possible to get the hole in the ratchet and the holes in the handbrake to align.

With this in mind I tried fitting just the ratchet on the pivot pin. It wasn't possible and I realised that something wasn't quite right! Comparing the two ratchet mechanisms showed up the problem.
Bizarrely, despite the fact that the two set ups are otherwise completely compatible, the hook part at the bottom on the older mechanism (on the left) is about 2mm longer than the same part of the newer mechanism (on the right). This ever so slight difference meant that the hole wouldn't line up right. After a few minutes with the Dremel I ground back the hook part to the same profile as the Spitfire 1500 one.

With that done, the rest of the assembly was straightforward with the only other slight problem being the pivot pin. On the Spitfire 1500 the pivot pin has a recess around it but, oddly, is retained by a clip that passes through a hole drilled close to the end. Sadly, the hole was drilled so close to the end that it had started to 'pull out', rendering it pretty much useless. Interestingly the older pivot pin was not drilled for a clip but still had the recess. An 'E clip' from my collection fitted securely and, apart from refitting the interior, the job was done.
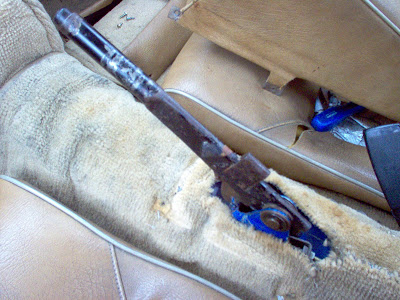
I gave it a try and discovered something was not quite right. The pawl didn't seem to want to pull away from the ratchet. I greased up the mechanism but it made very little difference. It was then of course that I worked out that the handbrake didn't have a spring in it! Luckily for me the 1500 spring is a perfect fit!

There we go. With the interior back in it looks pretty good. I just need to make my mind up about what type of grip I want to fit and it'll be perfect! At the moment I'm torn between going for the early style grip, which looks more comfy, or the later style, which would keep my car looking standard. Maybe there's another car that has a grip that's even better? I'll keep my eyes out for something suitable!