Showing posts with label brakes. Show all posts

Tuesday, April 28, 2009

HCR '09

We did it! My brother and I actually completed the Historic Counties Run! As might have been obvious from my last post's lack of words, things got a bit hectic heading towards the weekend. There was a seemingly endless list of small jobs to be done. This list included replacing a leaky caliper seal, replacing the brake light switch, an oil change, replacing the entire clutch hydraulic system, replacing the throttle cable, adjusting the timing, removing the old starter solenoid, fitting the Nippon Denso starter, fitting 12v sports coil, replacing ballast wire, balancing carbs and refitting the parcel shelf!
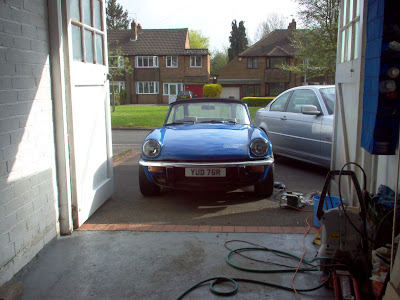
I set out from Walsall on the Saturday, planning to meet my brother in Cambridge on the way. I put the hood down and got to Cambridge station about an hour and a half later! With my brother, Henry, on board we headed down to Southwold. It was at this point that that Henry pointed out that he'd never actually driven my car before, so we swapped seats and he got his first experience of classic motoring! We got to Southwold a couple of hours before the 'off' and had a fish and chips on the pier.

The first half of the run was relatively straightforward for us. The only minor hitches were our failure to brim the tanks and pump up the tyres so we had to stop off and do that. We also had a bit of scare when the temperature gauge went off the scale. The engine didn't look or feel hot and the 'tell tales' on the cylinder head and radiator were normal. When I noticed the fuel gauge was also a bit dodgy and the speedo illumination had failed I stopped worrying about it which was just as well because it fixed itself a few hours later!
The second half was more intense. Henry did the graveyard shift while I navigated. Thanks to a sat nav cock up we ended up wasting about half an hour in Hampshire and thanks to a cock up on my part we nearly ended up missing out Shropshire! For me, the Welsh roads were the best part of the whole event. We had a great time keeping up with Phil in the magenta GT6. Annoyingly though we'd developed an leak from the front oil seal which was dripping Duckhams finest all over the front pulley. Unfortunately the pulley was flicking it all over the drivers side brakes. I can now categorically confirm that oiled brakes don't work very well! Fortunately the were still just about good enough to finish the event on and we made it to Newport only a couple of hours late!
The trip back would've been a bit much with the dodgy brakes, so I had to call the AA in the end and we made the journey back on a flatbed. In all honesty I wasn't even sure it'd make the start line so I was absolutely chuffed that we finished the event. We had a great time, drove on some great roads, met some cool people and ended up completely knackered. Next time I'm going to book some time of work afterwards!
More pics on my facebook album here!

Thursday, November 13, 2008

Fly Off Handbrake Conversion

One of the things I've been wanting to do for a while now is to fit a 'fly off' type handbrake. Obviously, there's nothing wrong with the standard arrangement, it's just that I prefer the way the 'fly off' type works.

So I started off by looking at the options. Early Spitfires came with this type of handbrake as standard, so I could get one of those or I could modify the one I had. I took a look at http://asciimation.co.nz/pics/flyaway/ which illustrates how to convert an MG handbrake. In theory it's relatively straightforward to convert from one system to the other. The only difference is that on a normal handbrake the rod with the button attached connects above the pivot point on the pawl whilst on a 'fly off' it attaches below the pivot point.

With this in mind I took off the old handbrake to see if it would be possible to convert it. Unfortunately the Spitfire 1500 uses a linkage where the rod arrangement hooks around the pawl at the top and there isn't any way to change it.

With that in mind I set about looking for an early Spitfire handbrake. These seem to be impossible to get from my normal parts suppliers but Ebay turned up a nice but chronically overpriced example. With time of the essence I just spent the cash! A couple of days later I my neighbour came round with a package and I could finally see if it would fit!

At first glance it looked almost exactly the same as the Spitfire 1500 arrangement, the only difference being that the grip part on the 1500 goes up at a slight angle whilst the early one is straight. I thought I might be lucky enough to be able to do a straight swap but it was not to be! With the cable fitted nicely and everything else looking okay I realised that I couldn't seem to refit the pivot pin. I realised the problem was the ratchet part of the mechanism not being in quite the right position so I tried moving it about with a screwdriver and various other things with no luck. It then dawned on me that something was obviously wrong and it might not be possible to get the hole in the ratchet and the holes in the handbrake to align.

With this in mind I tried fitting just the ratchet on the pivot pin. It wasn't possible and I realised that something wasn't quite right! Comparing the two ratchet mechanisms showed up the problem.
Bizarrely, despite the fact that the two set ups are otherwise completely compatible, the hook part at the bottom on the older mechanism (on the left) is about 2mm longer than the same part of the newer mechanism (on the right). This ever so slight difference meant that the hole wouldn't line up right. After a few minutes with the Dremel I ground back the hook part to the same profile as the Spitfire 1500 one.

With that done, the rest of the assembly was straightforward with the only other slight problem being the pivot pin. On the Spitfire 1500 the pivot pin has a recess around it but, oddly, is retained by a clip that passes through a hole drilled close to the end. Sadly, the hole was drilled so close to the end that it had started to 'pull out', rendering it pretty much useless. Interestingly the older pivot pin was not drilled for a clip but still had the recess. An 'E clip' from my collection fitted securely and, apart from refitting the interior, the job was done.
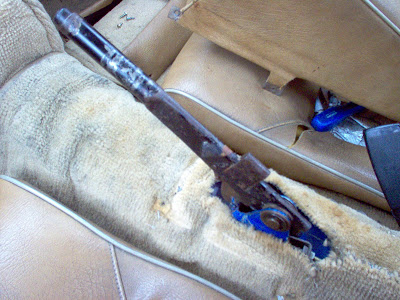
I gave it a try and discovered something was not quite right. The pawl didn't seem to want to pull away from the ratchet. I greased up the mechanism but it made very little difference. It was then of course that I worked out that the handbrake didn't have a spring in it! Luckily for me the 1500 spring is a perfect fit!

There we go. With the interior back in it looks pretty good. I just need to make my mind up about what type of grip I want to fit and it'll be perfect! At the moment I'm torn between going for the early style grip, which looks more comfy, or the later style, which would keep my car looking standard. Maybe there's another car that has a grip that's even better? I'll keep my eyes out for something suitable!

Monday, April 16, 2007

Brake Lines

I've been cracking on with the Spitfire a lot recently and I'm not doing too badly! The new master cylinders (both from Wilwood) are in and new braided brake and clutch hoses are made up and fitted.

Fitting braided hoses between the clutch slave and master is a good idea because there is a lot of vibration between their mounting points. Its no better than normal brake pipe between the brake master and the union but it looks cool and can be removed more easily! It certainly isn't any worse!

Anyway, in order to do this to your own car all you need to do is follow these easy steps!
  1. Get hold of about 3 metres of Euroquip brake hose (Rally Design part number EURO600) and four 3/8 x 24 UNF convex brake hose ends (Rally Design part number RD1500). If you've got Wilwood masters then you need to get two of those and two of part number RD1504 and use them with the supplied adaptors.

  2. What you then do is measure the hose out and cut it at the correct length. I used a junior hacksaw with a fine blade for cutting and it was pretty straightforward. A good tip is to wrap the hose in tape and cut through it to keep the braid from fraying everywhere.

  3. Now take apart the end connectors. You will have three peices - the bit that screws into the union, a brass olive and female threaded finisher that attaches it all together.

  4. Push the finisher onto the hose (you'll kick yourself if you forget this stage when it's the second connector you're attaching!)

  5. Now you're aiming to gently ease back the braiding around the end of the hose just enough to persuade the olive to go on the hose. I found this was relatively easy if you grab the end of the hose with the olive on and push it hard into the workbench. Make sure the olive is on the end of the hose as far as it can go!

  6. Now insert the hose onto the back of the threaded peice and make sure its pushed on firmly.

  7. Now pull the finisher down the hose and use it to lock it all together. Shouldn't need to be mega stupidly tight but it does need to crush the olive and keep it all locked together.

  8. Repeat as many times as needed.

  9. Check for leaks!

So there we have it - quite an easy and satisfying job. Just watch for the sharp ends of the braid cutting your fingers up as they can be really sharp.


Other jobs I've done include refitting the front quater valance I removed and resprayed earlier along with it's light unit and stripping out most of the interior to get at the clutch slave cylinder which I now need to bleed. The brakes are now done apart from the master cylinder reservoir. I have bought a used girling cylinder from Ebay and will use the reservoir from that - an idea I got from Club Triumph forum user '2 litre e'!

Tuesday, February 13, 2007

Update

Today I got back to work on the area around the master cylinders. I used a wire cup brush on an angle grinder and also on a drill to clean up the area around the wiper motor and the brake cylinder. This area appears to have been suffering for quite some time and is now quite badly pitted. Fortunatly the steel is still strong and I have no worries about the structural strength of the panel.

Having done my best with the wire brushes, I used Hammerite Rust Remover to sort the remaining rust. I'm not particularly impressed with this slimy green mixture but it seems to work alright and is inexpensive. When its gone I will replace it with the equivalent product from Bilt Hamber Laboratories, which I have heard great things about!

I still have the area around the clutch cylinder to wire brush but I sprayed the rest with primer just to minimise exposure to the air while I finish the rest off. This is how it's looking so far...


Another thing I've been getting on with is the drivers side quater valance. This now just needs flatting down and respraying before abrasive polish and then laquer can be applied. It's looking good so far but I'm not sure how close a match the colour is to the rest of the car!

Continuing the theme of modding the front of the car, I also cut the number plate horizontally so that it is the minimum size allowable by law. This means that there is only 11mm between the top of the letters and the edge of the plate. This gives a slight airflow advantage into the radiator because the area of the plate is reduced by 40 square cm. I think it looks better as well and saves 15g!


Finally, it also occured to me that I havent yet shown a picture of the T handle that I have fitted to the interior. This will eventually be used to activate a plumbed in fire extinguisher system but for the time being the cable remains curled up in the glovebox. I had initially planned to mount this in the dash but I made up a braket and mounted it just under the dash on the passenger side where the driver can reach it as well!

Saturday, December 30, 2006

Christmas Brake!

So I rolled the Spitfire out onto the drive, opened the bonnet and got a christmas suprise! And not a good one!

I was lacking a huge amount of clutch and brake fluid. So I topped up and had another look today and the area around the brake master cylinder is damp. The paint was flakey before and it's not going to get much better with fresh fluid pouring all over it! My plan is to rebuild (and possibly replace) both cylinders. I had previously replaced all brake and clutch parts except the clutch pipe and the master cylinders so I guess its about time! I thought I'd also take the time to repaint the bulkhead and sort out the pedals. I've finally managed to separate the 'Cross Shaft' and wasn't suprised it was so difficult to drift out - it had been put in dry and had just rusted in solid.

Of course I thought I'd improve things while I'm tinkering. I plan to replace the clutch pipe with a braided flexable version and to paint the finished cylinders black to aid heat dissipation. I have also chucked out the worn out pedal rubbers (60g) and replaced them with griptape. This is the stuff I used on my wakeskates and it's super hardwearing, waterproof and weighs so little I couldn't measure it on the scales! Not the biggest weight saving in the world but it all adds up!

Wednesday, February 15, 2006

More Braking News

Having sorted out the brakes at the front, I stupidly assumed that the back brakes would be OK. When I pulled off the wheels to reveal more broken bleed nipples, rust and rubbing hoses I wasn't all that pleased. In fact I was pretty pissed off! So I busted the angle grinder out and got medievil on the drums with a wire brush, followed by painting with my favourite silver brake paint. In went new wheel cylinders (from Ebay) and EBC brake shoes that I bought a couple of days ago at the Triumph show at Stoneleigh (from the Canley Classics stall). Finally, I also replaced the handbrake springs (which were knackered) and popped in some braided hoses (also bought from Stoneleigh). Job done!

Wednesday, September 01, 2004

Suspension Rebuild


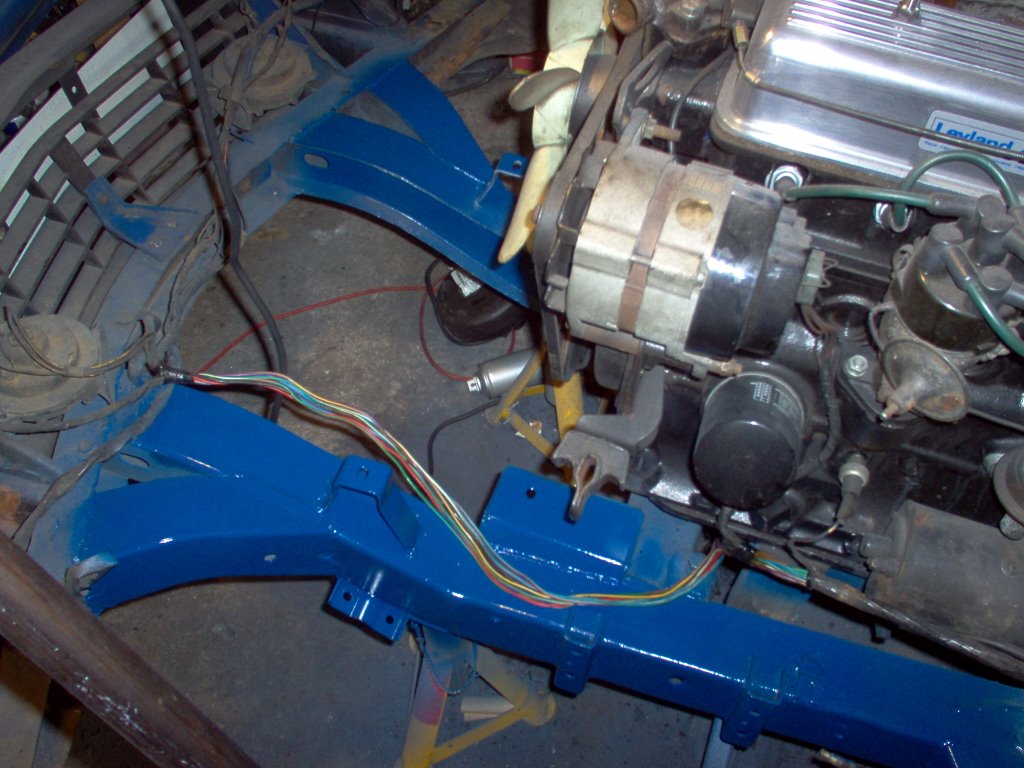
Having had a few months of driving the car about I am beginning to notice that the Spitfire clunks and clanks its way over the lumps and bumps in the road and that there is quite a bit of slack in the steering. The causes were obvious after poking around under the bonnet for a couple of minutes. ALL the bushes I could see were powdery and breaking apart and the steering ball joints had a lot of slop in them. On closer inspection the brake calipers didn't look too clever either because the previous owner had broken the bleed nipples off and just left them. This rebuild was quickly getting out of hand but I coudn't leave it having noticed how bad it was! I stripped off all the suspension, radiator and anti roll bar. I thought I might as well paint the chassis while the suspension was off and began the slow process of getting all the oil, Dinitrol and rust (and even some paint!) off the chassis.