Showing posts with label bodywork. Show all posts

Thursday, June 19, 2008

Quarter Valance Done!

Yes, I've finally finished it! When I last mentioned it I was putting colour coats on it but since then I've given it a coat of 'leveller', cut the paint back and lacquered it. The 'leveller' is good stuff. It basically 're-activates' the paint and leaves the surface smoother so you don't get the 'orange peel' effect that spraying with a can often gives. After the lacquer I gave it a good cutting back with Poorboys SSR2 followed by Meguires 'Paint Cleaner', Autoglym 'Super Resin Polish' and finally Poorboys 'Nattys Blue' wax. After all that I had a finished panel and a knackered arm!

So then all I had to do was fit the indicator unit and mount it all up in the car. Nothing special about fitting the indicators, they just go straight in. I use a little bit of electrical tape around the edges of the panel where the squire clips fit just to prevent them scratching and becoming a rust trap.


So then all that I needed to do was to fit it to the car! If you want to fit one of these without removing the spoiler or bumper then the best way to do it is to open the bonnet and drop it in from behind. Then do up the bolts and you're done. I think it looks pretty cool now!

I've just had a delivery from the royal mail and it looks like my afternoon is sorted! I ordered some brake unions from Merlin Motorsport yesterday and they've arrived today along with the light 'nests' and wiring from SVC. I've just had a quick look at the wiring and they look perfect. Just got to fit them now!

Thursday, January 10, 2008

Finally! An Update!

Okay so its been a long time coming but here's the first update in quite some time! I've been busy over christmas but not on the car sadly...

I got back from NZ on the 28th of November and since then seeing the girlfriend, christmas and pilot exams have all taken their toll on my spare time but that dosent mean I havent been busy getting a few bits sorted out for the car!
I've always said that that time and money are the two biggest factors in how I work on my car. Sometimes I've got time and no money so I lighten up some stuff or do a few little jobs and sometimes I've got more money than time and I buy some nice shiny bits! I've not had the time recently so the shiny bits have been rolling in!
Here's a few bits and bobs I've recently aquired. First off is something I've been after for a while - an alloy engine backplate. I bought one of these from Dave 'Sideways' Powell a while back but postal incompetance meant that it never arrived so I bought one from Canley Classics the other week.
Wierdly it looks smaller when it's not on the car! Looks nicely made with all the holes in the right place so it gets the thumbs up from me! Not planning to fit it at the moment so I'll probably just chuck it in the parts box untill I can fit it. I'll probably leave it till I replace the clutch and chuck in a lightweight flywheel, race clutch, alloy bellhousing etc etc.

I also thought I'd treat myself to an alloy alternator bracket (again from Canley Classics). I know its not going to save a tonne of weight but it sure does look cool!

I've also had a chance to check out the rocker spacers. I might well take the rocker shaft out and rebuild it while I'm out in NZ to give me something to do on the boring days I'm not flying! I may even take the Dremel out there and smooth and polish the rockers up!

I've also been working on the wheels I bought. It's been an epic mission to strip all the old paint off. There were about four layers and each seemed to be better applied than the last. It took a whole bottle of nitromoors to get it sorted and even then it took an epic amount of time with wire wool and wire brushes to get the final bits of paint off! I'm still finishing them off but one is painted up nicely and the result is pretty good. What do you think?

Of course I had to get some nuts to bolt them up. I will eventually upgrade the studs, but for now I bought nuts to fit the standard size studs. I got them from Speedshack and I can thoroughly recommend them. They knew exactly what they were talking about and got them delivered in double quick time so they get a recommendation from me!

I'm also trying to fit the 'all orange' indicators that 'GT6Steve' sent me from Las Vegas but I've run into a bit of a stumbling block. It seems that the fitment of them to a UK spec spit is not as straightforward as it would seem. The bulb holding back part of the light is bigger than the UK ones so it needs the hole opening up with the trusty Dremel!

And finally a request for help! Anyone know how to remove the standard type of mirrors that come come on a Spitfire? I've only got one on the drivers side and theres a screw sunk into a recess on the back of it but it dosent seem to want to move! Do I have to get at it from the inside of the door?

Monday, April 16, 2007

Brake Lines

I've been cracking on with the Spitfire a lot recently and I'm not doing too badly! The new master cylinders (both from Wilwood) are in and new braided brake and clutch hoses are made up and fitted.

Fitting braided hoses between the clutch slave and master is a good idea because there is a lot of vibration between their mounting points. Its no better than normal brake pipe between the brake master and the union but it looks cool and can be removed more easily! It certainly isn't any worse!

Anyway, in order to do this to your own car all you need to do is follow these easy steps!
  1. Get hold of about 3 metres of Euroquip brake hose (Rally Design part number EURO600) and four 3/8 x 24 UNF convex brake hose ends (Rally Design part number RD1500). If you've got Wilwood masters then you need to get two of those and two of part number RD1504 and use them with the supplied adaptors.

  2. What you then do is measure the hose out and cut it at the correct length. I used a junior hacksaw with a fine blade for cutting and it was pretty straightforward. A good tip is to wrap the hose in tape and cut through it to keep the braid from fraying everywhere.

  3. Now take apart the end connectors. You will have three peices - the bit that screws into the union, a brass olive and female threaded finisher that attaches it all together.

  4. Push the finisher onto the hose (you'll kick yourself if you forget this stage when it's the second connector you're attaching!)

  5. Now you're aiming to gently ease back the braiding around the end of the hose just enough to persuade the olive to go on the hose. I found this was relatively easy if you grab the end of the hose with the olive on and push it hard into the workbench. Make sure the olive is on the end of the hose as far as it can go!

  6. Now insert the hose onto the back of the threaded peice and make sure its pushed on firmly.

  7. Now pull the finisher down the hose and use it to lock it all together. Shouldn't need to be mega stupidly tight but it does need to crush the olive and keep it all locked together.

  8. Repeat as many times as needed.

  9. Check for leaks!

So there we have it - quite an easy and satisfying job. Just watch for the sharp ends of the braid cutting your fingers up as they can be really sharp.


Other jobs I've done include refitting the front quater valance I removed and resprayed earlier along with it's light unit and stripping out most of the interior to get at the clutch slave cylinder which I now need to bleed. The brakes are now done apart from the master cylinder reservoir. I have bought a used girling cylinder from Ebay and will use the reservoir from that - an idea I got from Club Triumph forum user '2 litre e'!

Tuesday, February 13, 2007

Update

Today I got back to work on the area around the master cylinders. I used a wire cup brush on an angle grinder and also on a drill to clean up the area around the wiper motor and the brake cylinder. This area appears to have been suffering for quite some time and is now quite badly pitted. Fortunatly the steel is still strong and I have no worries about the structural strength of the panel.

Having done my best with the wire brushes, I used Hammerite Rust Remover to sort the remaining rust. I'm not particularly impressed with this slimy green mixture but it seems to work alright and is inexpensive. When its gone I will replace it with the equivalent product from Bilt Hamber Laboratories, which I have heard great things about!

I still have the area around the clutch cylinder to wire brush but I sprayed the rest with primer just to minimise exposure to the air while I finish the rest off. This is how it's looking so far...


Another thing I've been getting on with is the drivers side quater valance. This now just needs flatting down and respraying before abrasive polish and then laquer can be applied. It's looking good so far but I'm not sure how close a match the colour is to the rest of the car!

Continuing the theme of modding the front of the car, I also cut the number plate horizontally so that it is the minimum size allowable by law. This means that there is only 11mm between the top of the letters and the edge of the plate. This gives a slight airflow advantage into the radiator because the area of the plate is reduced by 40 square cm. I think it looks better as well and saves 15g!


Finally, it also occured to me that I havent yet shown a picture of the T handle that I have fitted to the interior. This will eventually be used to activate a plumbed in fire extinguisher system but for the time being the cable remains curled up in the glovebox. I had initially planned to mount this in the dash but I made up a braket and mounted it just under the dash on the passenger side where the driver can reach it as well!

Monday, November 13, 2006

Update! (Carbs and Bodywork)

I thought I'd better just update my blog. I've had a busy few weeks working on the car. Firstly, I took the carbs off and rebuit them with new throttle shafts. I took time with the Dremel to thin them out to about half the normal thickness (as recommebed by Kas Kastner and others) but I didn't bother thinning the butterflies for the tiny difference they'd make.

With it all refitted to the car I set about setting the carbs up. One of the most important things to get right is the same amount of air must be sucked in by each carb. In order to check that you need a carb balancer. So after trying out a Gunson Carbtuner and finding out it was absolute crap I got on eBay and bought a decent flowmeter from Eurocarb (who I can highly recommend for their excellent customer service).

So with balance set using the flow meter and mixture set using a Gunson Colourtune it was all good and sounding better than ever. Unfortunatly whilst it revs beautifully and cleanly on the drive it's a bit stuttery on the road. I haven't got around to sorting yet but I will!

I've also been sorting out an unsightly rust scab that had been lurking around on the drivers side of the windscreen frame. I was pleasantly suprised to find no deep structural rust and can happily report that the area has been rust killered and primered and the top coat is drying as I write this. It's looking better already!

Wednesday, September 01, 2004

Suspension Rebuild


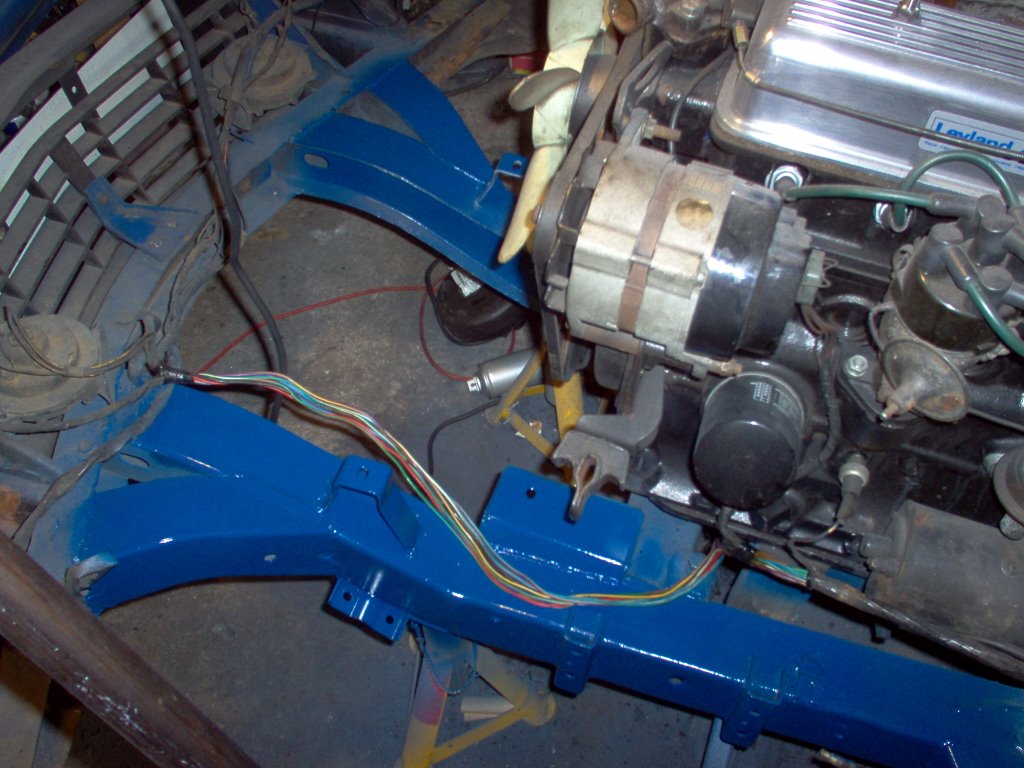
Having had a few months of driving the car about I am beginning to notice that the Spitfire clunks and clanks its way over the lumps and bumps in the road and that there is quite a bit of slack in the steering. The causes were obvious after poking around under the bonnet for a couple of minutes. ALL the bushes I could see were powdery and breaking apart and the steering ball joints had a lot of slop in them. On closer inspection the brake calipers didn't look too clever either because the previous owner had broken the bleed nipples off and just left them. This rebuild was quickly getting out of hand but I coudn't leave it having noticed how bad it was! I stripped off all the suspension, radiator and anti roll bar. I thought I might as well paint the chassis while the suspension was off and began the slow process of getting all the oil, Dinitrol and rust (and even some paint!) off the chassis.