Saturday, December 30, 2006

Christmas Brake!

So I rolled the Spitfire out onto the drive, opened the bonnet and got a christmas suprise! And not a good one!

I was lacking a huge amount of clutch and brake fluid. So I topped up and had another look today and the area around the brake master cylinder is damp. The paint was flakey before and it's not going to get much better with fresh fluid pouring all over it! My plan is to rebuild (and possibly replace) both cylinders. I had previously replaced all brake and clutch parts except the clutch pipe and the master cylinders so I guess its about time! I thought I'd also take the time to repaint the bulkhead and sort out the pedals. I've finally managed to separate the 'Cross Shaft' and wasn't suprised it was so difficult to drift out - it had been put in dry and had just rusted in solid.

Of course I thought I'd improve things while I'm tinkering. I plan to replace the clutch pipe with a braided flexable version and to paint the finished cylinders black to aid heat dissipation. I have also chucked out the worn out pedal rubbers (60g) and replaced them with griptape. This is the stuff I used on my wakeskates and it's super hardwearing, waterproof and weighs so little I couldn't measure it on the scales! Not the biggest weight saving in the world but it all adds up!

Thursday, November 30, 2006

Attention to Detail(ing)!

Having a car that actually works and dosen't require constant rebuilding of parts is quite a wierd feeling! Possibly that is the reason that I have become a bit more obsessive about how my car looks over the past few weeks.

Detailing is the very thorough cleaning of a car and the basic stages can be broken down into steps. Firstly you need to was the car using a proper car shampoo and a sponge to get all the dirt off the paintwork. Then you need to use soapy water to wet the paintwork while you slide a clay bar over the surface to pull contaminants out of the paint surface. Then you polish and then you wax!

So I started off by giving it a clean with some proper car shampoo and a sponge. Without the encrusted mud up the sides it looked a whole lot better! I then used a Sonus (medium) clay bar lubricated with soapy water to clean the paint until it was perfectly smooth. I then used Autoglym Super Resin Polish and overcoated it with Poorboys World Natty's Blue Paste Wax. The heavily oxidised boot and bonnet were polished using Poorboys World SSR2 which is a compound polish.

I was very impressed with the difference the clay bar and the Poorboys World products made. The bonnet and boot really do have paintwork in poor condition but the improvement was immense. The only downside to the whole process is that the thorough cleaning has highlighted a fair few bits of bodywork that need doing!

Monday, November 13, 2006

Update! (Carbs and Bodywork)

I thought I'd better just update my blog. I've had a busy few weeks working on the car. Firstly, I took the carbs off and rebuit them with new throttle shafts. I took time with the Dremel to thin them out to about half the normal thickness (as recommebed by Kas Kastner and others) but I didn't bother thinning the butterflies for the tiny difference they'd make.

With it all refitted to the car I set about setting the carbs up. One of the most important things to get right is the same amount of air must be sucked in by each carb. In order to check that you need a carb balancer. So after trying out a Gunson Carbtuner and finding out it was absolute crap I got on eBay and bought a decent flowmeter from Eurocarb (who I can highly recommend for their excellent customer service).

So with balance set using the flow meter and mixture set using a Gunson Colourtune it was all good and sounding better than ever. Unfortunatly whilst it revs beautifully and cleanly on the drive it's a bit stuttery on the road. I haven't got around to sorting yet but I will!

I've also been sorting out an unsightly rust scab that had been lurking around on the drivers side of the windscreen frame. I was pleasantly suprised to find no deep structural rust and can happily report that the area has been rust killered and primered and the top coat is drying as I write this. It's looking better already!

Tuesday, October 24, 2006

Breakdown!

I had a particularly unlucky day today! Seeing as the weather was decent I pulled on a jumper and scarf and got the top down and hit the road. Filled up with another tenner of Shell V Power and took a tour around the local fast A roads. Lovely!

I got home and agreed to have a coffee with a mate in Birmingham so I hopped back in the Spit and headed over there! Stopped to let a particularly nice Mk1 Escort pull out in front (and gasped in awe as I heard his dump valve and realised he was running the Cosworth lump) before getting caught up at the lights. Then I noticed I was idling quite high so I blipped the throttle to try and close the butterflies more firmly but to no avail and subsequent stops showed the problem was getting worse! Eventually I gave up and called the AA.

When the guy showed up he had a good look over it but was just as stumped as me. So I got him to tow me home and, after my first ever towing experience, I whipped the carbs off.

So far I'm still pretty stumped but I'm going to replace the really quite badly worn throttle shafts (see photo) and then put everything back together and hope I come across the problem when refitting!

Tuesday, October 17, 2006

Core Plugs

I thought I'd replace the core plugs while I had the head off and I'm beginning to regret that now! I first tried drilling a hole and putting a self tapper in there before using the claw hammer to try and lever it out. All it did was pull out the self tapper and make the hole bigger! So after trying a bit more with larger screws and the same results I realised I was in for a long slog. After copious amounts of levering, grinding, bashing and swearing it came out looking like this and the hole it came out of is completely undamaged which is great because if you damage the seat they never seal up properly again!

Friday, October 06, 2006

More Cylinder Head Porting Stuff!

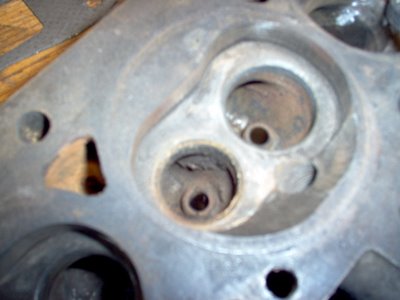
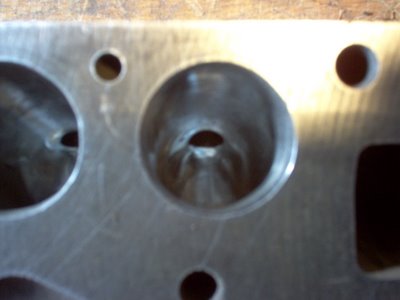
Just a quick update on the cylinder head! Basically on the Triumph 1500 head the valves are recessed into pockets in the port to give a flat surface for the original makers to drill the valve guide holes into (according to David Vizard's book) and this has the effect of really messing up the airflow through the port. His book mentions using 'chemical metal' style filler to fill up the pocket but I wasn't keen on a chunk of that falling into my newly rebuilt engine to say the least! So, I ground out the pocket as much as I can and smoothed the ports as much as possible without enlarging them. At the moment the inlets are all nearly done, the chambers are half way to being polished and I've made a start on the exhaust ports, which were simply dreadfull. Huge chunks of metal were lurking about where the casting was just appauling and there were more small pockets for the valve guides to grind out. The water jackets run closer to the exhaust ports so I have been more convervative that the inlets but it still looks a lot better!

Check out the nasty casting marks in the exhaust port! This is one of the better ones and some were far worse than this!

The nearly finished inlet ports looks a whole lot better than they did to start with!
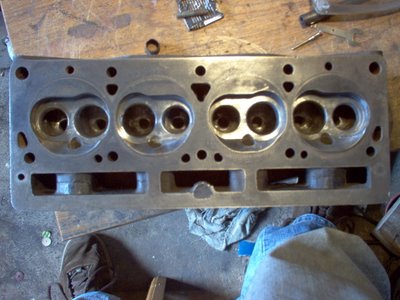
And I'm also about halfway through polishing the chambers!

Tuesday, October 03, 2006

Oil Change

Completed an oil change today. It's been 1300 happy miles of motoring since the new engine went in. Not much but then it has been laid up for a few years! Anyway, All went smoothly apart from the sump plug which managed to pop out of my hand and into the rapidly increasing puddle of oil in the metal tray. For once though it wasnt a big deal as all I had to do was have a rummage through my spares box to find a magnetic sump plug I got on Ebay a while back and had been waiting for an oppertunity to fit! I also replaced the filter while I was there with a FRAM filter I bought from Canley Classics a few months ago. After the nerveracking bit where the oil pressure light comes on because the filters filling with oil there were no oil leaks (no new ones anyway!) and it was time to take a test drive! All was well, although there is a bit of a leak from the rear oil seal which smokes off on the exhaust, so that'll be something to do on another day!

Tuesday, September 26, 2006

Cylinder Head Start

I have been far too busy working on the Spitfire recently! Firstly the fuel that was leaking out of the carbs has been stopped! Despite replacing the needles and spacing the fuel pump away from the block with a few gaskets there was still an abundance of leaking petrol. For the time being I have installed a Malapassi Filter King that I bought from my local tuning goodies shop (Midland Performance Centre) where they are always friendly and the prices are keen!

I have also got hold of a cylinder head to port! I missed an ebay auction for one and, when it didn't meet its reserve, I nipped in there with a cheeky offer and got it. I've been getting at it with the grinder ever since it arrived and now I know why getting cylinder heads modified is so expensive! It is very labour intensive work. My intentions are to port match the head to the manifold and to smooth the ports out and finish them with 60 grit paper to promote fuel atomisation. I will polish the exhaust ports and chambers to prevent carbon build up and then I will get 3 angle valve seats done on the valves and seats. At the moment I am dealing with the port around the valve guide which is heavily enclosed by the port (see the pictures). It is still work in progress and it is still far from finished!


Monday, September 11, 2006

Port Matching

I've not had much to do recently on the car and I've just been enjoying using it but recently a problem has reared its ugly head!

I'd been noticing quite a petrol smell when using the car over the last few days but hadn't managed to pin it down until the other day. I suspected the float chambers were leaking petrol but hadn't seen them actually do it until the other day when the right hand carb managed to overflow while I was watching. Having recently had a new fuel pump, I think the increased pressure is overcoming the valves and causing petrol to spill from the overflow. New needle valves have been ordered and I will also try putting a few gaskets between the fuel pump and block to turn the pressure down a bit.

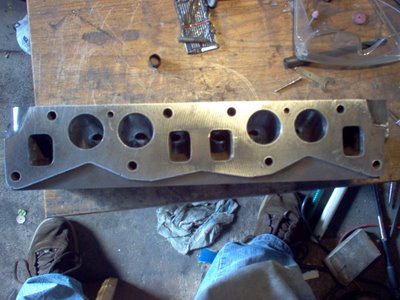
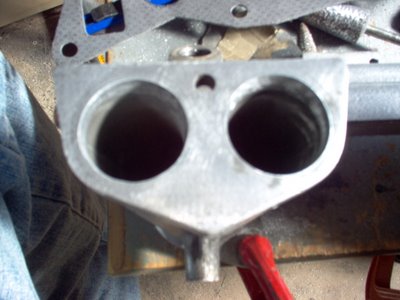
I've also recently started reading a lot about port matching and other cylinder head work. It looks like it'd cost big bucks to get done professionally so I thought why not give it a go at home on an old inlet manifold, then I can get a second hand head and have a go with that! So I started yesterday with the port matching. This boils down to getting the size of the ports on the manifold the same as those on the head. I decided the easiest way to do it would be to enlarge both to the size of the gasket holes. The inlet manifold is already dowled on the Spitfire 1500 so that made life easier to start with. Then I used blue marker around the holes in the manifold where it attaches to the head and fitted the gasket with some bolts through the dowel holes. I could then scribe around the edge of the gasket and see how much material needed removing to bring the manifold holes to just under the size of the gasket holes.

Gradually I have been working the inlet manifold out to the size of the gasket and now I just need to smooth and polish the inside of it as much as possible. Anyway after a few hours with some cutting stones they all looked like this!

Now all I need is a cheap cylinder head of ebay so I can get started on that without worrying too much if it all goes wrong!

Tuesday, August 29, 2006

Horn Push Sorted!

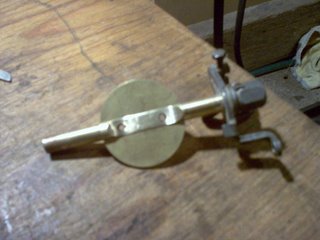
I fixed the horn push today. After posting on the Club Triumph forum it seemed that virtually nobody has made a Mountney horn push work! I have and here's how I did it! Basically I didn't bother soldering a wire between the 'pencil connector' and the horn push, instead I drilled out the rivet holding the crimp connector on the back of the push and instead rivited a strip on metal along the back along with another rivet to keep it from spinning round. This makes contact with the 'pencil connector' and completes the circuit when the horn is pressed. Job done!

Monday, August 28, 2006

All done!

So after all the years of messing about with engines, exhausts, suspension, dashboards, brakes, overdrives and carbs its finally drivable! I went to pick up the car from Karl on Saturday and drove it back home, stopping only to tax it at the post office!


It drives beautifully and the modifications have made it very different to drive to how it was before in both a good and a bad way! On smooth roads the 380lb springs and AVO dampers mean it handles amazingly and goes exactly where it's pointed without leaning at all, but on bumpy roads it really is spine jarring and it really crashes into potholes. The red Polybushes also transmit much more feedback through the steering and chassis. I can literally feel white lines in the road when I run over them!
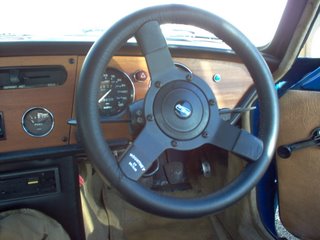

The 12" Mountney steering wheel means I can finally get my legs in properly and the steering dosen't seem to have got noticably heavier. It looks great but I'm having a bit of a job getting the horn push to work! Karl gave it his best go, soldering a wire from the push to the 'pencil connector' (the way recommended by most of the people I asked on the Club Triumph forum) but the pressure of the spring keeps popping the horn push out of the steering wheel so watch this space for a better solution!
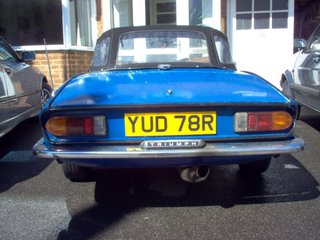

The exhaust is looking pretty good too! It's not too loud when coasting but has a lovely throaty roar when accelerating hard! When I get round to redoing the mounts I will also move the tailpipe out a bit as my back bumper gets covered in soot around the part where the exhaust exits!
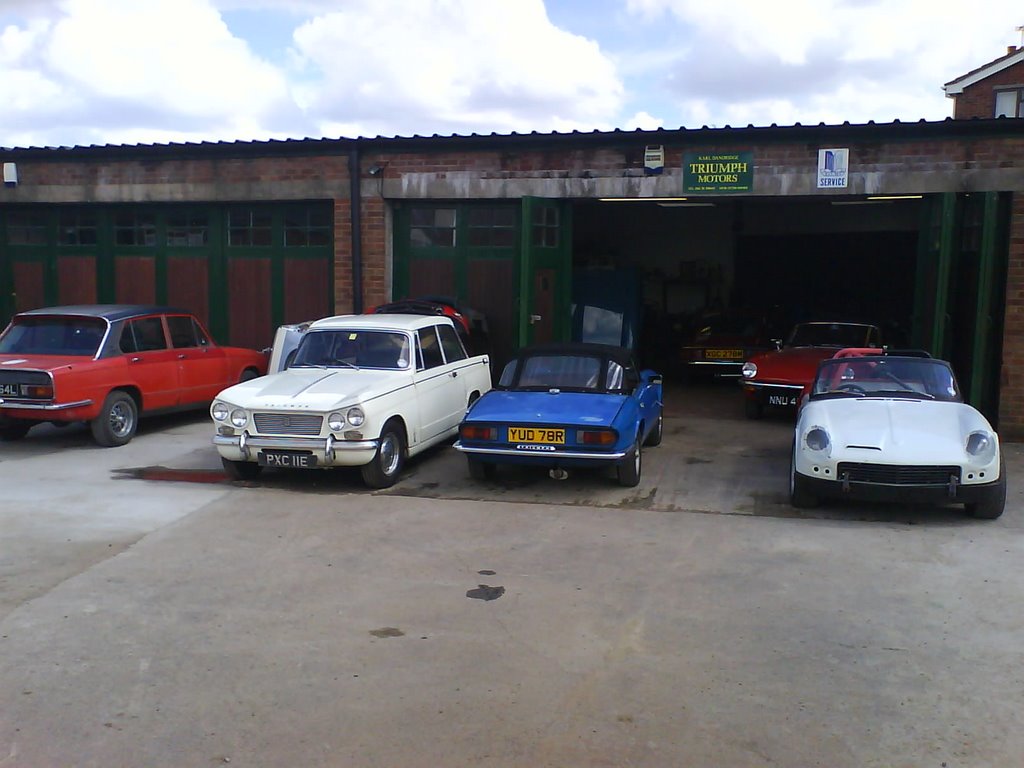
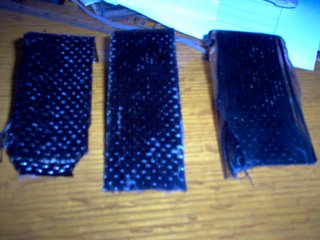
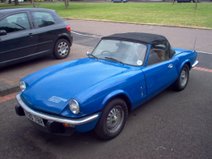
With all the mechanicals now done it must be time to start considering what to do about the bodywork! The current paint looks awful and the floors need replacing so it looks like it might be time to learn how to weld and spray!

Friday, August 25, 2006

MOT Passed!

I was delighted to get an email from Karl this morning to tell me that I've now got an MOT'd Spitfire! He added that is goes really well and handles nicely too (now the tracking's been done!). He's was still trying to find the origins of an oil leak when I called him but told me he'd managed to fit the 12" steering wheel which I couldn't get it to seat properly on the splines. Apparently I didn't have enough column poking through or a big enough washer to get it to fit properly! He's also fitted the longer bolts I ordered from John Wolfe and sorted the brakes which needed adjusting at the back and bleeding.

In other Spitfire news, I have had a rethink about how the exhaust back box attaches to the car and now I intend to mount it differently thanks to advice given on the Club Triumph message forum. I will now be using an exhaust 'bobbin' bolted to the floor and a small bracket bolted to that to mount the silencer up to. Should pull the thing closer to the bottom of the car and stop me worrying about speedbumps!

Monday, August 21, 2006

Caught on Camera


Noticed this picture on Karls blog today! Like he says, he's got the best job in the world!

Monday, August 14, 2006

Spitfire at the Showcase

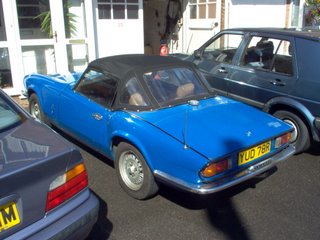
I went to the Showcase cinema in Walsall last night to see 'Miami Vice', a film which seemed to have none of the charisma of the 80's TV series but lots of fast cars and boats instead. The result looked like a two hour long music video and I wasn't impressed. My mood was improved no end however, when I saw a Spitfire 1500 in the car park next to my everyday Golf. It was is seemingly excellent condition and advertised that it was for sale for £3000. Wierdly, it was exactly the same colour (Tahiti blue) and had exactly the same beige interior! The only real difference was that this other car had been fitted with wire wheels, something which I really hate!

I can't understand why a small part of the Triumph world loves to do this to a poor old Spit. I mean wire wheels look great on the early Triumphs but in '76, when the 1500's came out they were old fashioned. Its like ripping the alloys of a BMW and whacking steels on there - it just dosen't make sense! Stuff like luggage racks on the boot, chrome dashpot covers and wheel embelishers are also horrific and should never be seen!

Saturday, August 12, 2006

Nearly done!

I got an email last week from Karl asking if he could have the car another week. It worked out quite conveniently as I needed to spend the weekend flat hunting! Apparently though the longer 'Wolfitt spec' wishbone bolts are in place and there's just a few more jobs left to do before it's MOT!

In 'other news' I have spent a few days trying out a few things with Carbon-fibre. I saw an article in Practical Perfprmance Car (http://www.ppcmag.co.uk) about it where they talked about a few techniques for working with it. I had been hoping to make a few bits and bobs from the black stuff and bought about 0.5 sq metres on Ebay at a bargain price to experiment with!

All I can say is that it's a lot harder than it looks and whilst I have only made a few small test pieces I have realised that it takes a lot of skill to avoid 'pinholes' (air bubbles in the resin surface). I have also had the frustrating experience of having a piece jam solid in the mold (despite a massive polishing effort). It was the height of frustrating that I destroyed the mold and subsequently the piece in my effort to seperate the two! I will be investing in higher quality resin and repeating the process when I feel mentally strong enough and when the effects of the resin smell have worn off!